Friday, April 30, 2010

It's a Horse, of Course (Birthday Cake)

Here's an interesting birthday cake for you. My daughter has been begging for a horse cake for a few birthdays now.  She wanted to me carve a horse out of cake and frost it to look like a horse, but I told her there's no way that I could manage that.  (Especially with my farm-animal-turned-cake track record.....)  Finally, I said I'd do it, but only if I could use one of her plastic toy horses.  She agreed!!  If only I had known that 2 years ago....  This was one of the easiest cakes ever.  A single-layer vanilla bean cake, frosted with simple butter frosting (softend butter, powdered sugar, vanilla and a bit of milk),  and covered with coconut grass (put coconut into a ziplock bag with two drops of green food coloring and shake, shake, shake).  Mr. Horsey looks like he's enjoying a wonderful meal of ankle-deep coconut grass.  Good times, good times. 

Favorite Vanilla-Yellow Cake

1/2 cup unslated butter, softened
3/4 cup white sugar
4 egg yolks
1/4 cup and 2 tablespoons milk
1 teaspoon pure vanilla extract
1 cup cake flour
1 teaspoon baking powder
1/4 teaspoon salt
1 vanilla bean, split, seeds scraped out

1.  Preheat oven to 350 degrees F (175 degrees C). Butter and flour one 8-inch round pan, or a heart-shaped pan. Line bottom with waxed paper and butter the wax paper.

2.  Whisk together the flour, baking powder and salt. Set aside. In a large bowl of a stand mixer, cream together the butter and sugar until light and fluffy. Beat for 3-5 minutes to get a nice, light and fluffy cake. Beat in the egg yolks one at a time, then stir in the vanilla and vanilla bean seeds. Beat in the flour mixture alternately with the milk, mixing just until incorporated. Pour batter into prepared pan. Tap pan on countertop a few times to get rid of air bubbles.

3.  Bake in the preheated oven for 25 to 30 minutes, or until top springs back when lightly tapped, or toothpick comes out clean. Cool 15 minutes before turning out onto cooling rack.

**This post and photos are property of http://dishingwithdish.blogspot.com**

Wednesday, April 28, 2010

Veggie-Cheese Salad

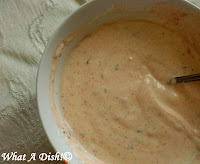
I love this salad.  My mom made it while I was growing up, and now I've started making it too.  You whisk together a dressing featuring mayo, sour cream, some lime and lemon juice, herbs and spices.  Light sour cream and mayo work well.  Then, toss the dressing with chopped veggies.  I like to use halved cherry tomatoes- that way you don't have to worry about seeding them.  (I probably use about a cup.)  I also like to use a long English cucumber.  So good, easy, and everyone loves it!

Veggie-Cheese Salad
adapted from Taste of Home

3 cups shredded cheddar, Monterey Jack and/or mozzarella cheese
1 medium to large cucumber, chopped
1 medium tomato, seeded and chopped (or about 1 cup halved cherry tomatoes)
1 green onion, thinly sliced
1 red, yellow, orange or green sweet bell pepper, chopped
1/2 cup sour cream (light works)
1/4 cup mayonnaise (light works)
1 tablespoon lemon juice
1 tablespoon lime juice
1 garlic clove, minced
1/2 teaspoon Dijon mustard
1/2 teaspoon dried basil
1/2 teaspoon dried marjoram
1/2 teaspoon paprika
1/2 teaspoon sugar
Lettuce, optional

In a bowl, combine cheeses, cucumber, tomato, onion and peppers.  In a small bowl, combine sour cream, mayonnaise, lemon and lime juice, garlic, mustard and seasonings; mix well.  Pour over veggies and toss to coat. Chill for 1 hour. Serve in a lettuce-lined bowl if desired. Yield: 6-10 servings.
**This post and photos are property of http://dishingwithdish.blogspot.com**

Tuesday, April 27, 2010

Ocean Views

Living on an island, some people may start to take the ocean for granted.  I don't- I love looking at it every chance I get and I never get tired of it.  Traveling around with my parents gave us some more oppurtunities for picture-taking.  I believe my husband took all of these pics.  The first picture is of a tiny island off our island.  Usually, it's brown and ugly, but during this super wet spring, it actually has some green vegetation growing on it. 

This picture is another shot from the same point we took the first picture, just looking in a different direction.
A shot of the same tiny island (in the 1st picture), taken a little down the coastline.  Clouds had started to move in, so the ocean wasn't as brilliant blue as before. 

**This post and photos are property of http://dishingwithdish.blogspot.com**

Monday, April 26, 2010

The Island of Cows!

Cows are seriously everywhere here.  One has to pretty much just look out their door or window to see one.  (In our case, it's out of our upstairs bathroom window... ha ha ha).  The country side here is broken up into pastures, lined with stone walls, and the cows are moved from pasture to pasture.  When all the grass from one pasture is eaten, they are moved to another.  Most times, they use the main roads to move the cows.  During many of our outings, we have to stop and let "cow parades", as we call them, pass us by before we can drive again.  These are pictures we took during my parents' visit of different cows, and cow parades.


Above is a brown cow parade- I think that was the first brown cow parade we've seen.  Usually they're the black and white Holstein cows (shown below).

Holstein cow parade, above.  Below, cows in a pasture.  We were up on a hill and there was some fog moving in. 

**This post and photos are property of http://dishingwithdish.blogspot.com**

Sunday, April 25, 2010

Death of a Peep

Thanks to Grandma and Grandpa L for the fun Easter packages!  The kids loved them.  Unfortunately, a few of the peeps didn't make it... my husband got ahold of them and decided to have some fun, roasting them over our gas stove.  My brother and parents were visiting at the time, and my brother got really into it, too. 

I thougth the Peeps had a strange chemical taste when roasted, but others seemed to like them.  I had the idea to make a Peep S'More, which is what we did with some of them- everything is better with melted chocolate on top!!  "Recipe" is included below!!  :) 

Peep S'more

1 whole graham cracker, broken into 2 pieces
1 Peep, roasted over some kind of flame
few squares of chocolate

Place the roasted peep on a graham cracker half, and cover with chocolate, and then the other graham cracker half. 

**This post and photos are property of http://dishingwithdish.blogspot.com**

Thursday, April 22, 2010

Sightseeing Around the Island

My parents came out for a visit last week, so a lot of sightseeing was in order.  We took them all around the island, and took pictures of some really cool things.  Above is an old fountain.  There are many of these around the island, and most of them have the year they were made inscribed onto them.  This is one of the oldest I've seen here- from 1876. 

Below is a pic of a city view- you can see the cathedral I talked about here

We walked down through the town and into the cathedral for the first time.  I got some inside shots, but they turned out a bit blurry because it was so dark. 

More pictures to come later!


**This post and photos are property of http://dishingwithdish.blogspot.com**

Tuesday, April 20, 2010

Egg Salad

I know that one doesn't really need a "recipe" for egg salad, but I love it, and liked this photo, so I'm putting it on here anyway.  My approx. measurments, that is, because I didn't measure.  I made this a few days after Easter, using our leftover Easter eggs.  Good times, and I love how egg salad tastes just like a deviled egg on bread, with some crunchy pickles added in.  I ate this on a crusty roll.  Yum yum!! 

Egg Salad
by What a Dish!

1 hard-boiled egg (2 if you are a heartier eater)
2 tablespoons mayonnaise
1 tablespoon spicy brown mustard, or grainy dijon mustard
pepper, to taste
1-2 baby dill pickles, chopped
1 roll or 2 slices sandwich bread

Chop egg and place in a small bowl.  Add mayo, mustard, pepper, and chopped pickles.  Add other seasonings, if desired.  Spread into a sliced roll, or on sandwich bread, and enjoy.  :)
*The egg salad alone is gluten-free.

**This post and photos are property of http://dishingwithdish.blogspot.com/ **

Friday, April 16, 2010

Parmesan Focaccia Bread

This is an easy, yummy focaccia recipe to make with soup for a cold days' dinner.  I've made this recipe quite a few times and the family loves it.  It makes 2 round loaves, and they are baked in cake pans. 

Parmesan Focaccia Bread

1 1/3 cups warm water (110 degrees F/45 degrees C)
2 teaspoons yeast
1 teaspoon white sugar
1 teaspoon salt
4 teaspoons olive oil
2 teaspoons Italian seasoning
4 1/4 cups flour (I use one cup of whole wheat pastry flour)
1/3 cup olive oil (or to taste!)
1/4-1/2 cup grated Parmesan cheese (use more of less to taste)

1.  In a large bowl (or the bowl of your stand mixer) place the yeast and water.  Pour the warm water over it, and allow to bloom for 5-10 minutes.  Yeast should foam and bubble.  Mix in the  salt, olive oil, oregano, and 2 cups of the flour.  Mix together well, and then knead, adding in as much flour as necessary to form a smooth, firm, non-sticky dough.  I knead in my Kitchenaid, but you can also knead by hand- about 8-10 minutes. 

2.  Transfer the dough to an well-oiled bowl, and turn once to grease top.  Let rise about one hour.  Then, transfer the dough into two oiled, 8 inch, round baking tins (I use cake pans). Allow to rise until doubled in bulk (about 30 minutes).  Preheat the oven to 400 degrees F.

3.Poke the loaves all over with your finger, right to the bottom of the tin. Allow to rest for another five or ten minutes.

4.Pour olive oil over the top of the loaf, and sprinkle with parmesan cheese.

5.Bake at 400 degrees F (205 degrees C) in center of oven for approximately 20 minutes, until golden.
**This post and photos are property of www.dishingwithdish.blogspot.com **

Sunday, April 11, 2010

Lemon Bars

Lemon bars are one of my favorite desserts.  I came across this old picture I took of some a few years ago, and remembered that this recipe was really good, so I thought I'd post the recipe here.  Remember- no substitutions!!  ;)

Lemon Bars

Ingredients:
1 cup butter, softened
1/2 cup white sugar
2 cups all-purpose flour

4 eggs
1 1/2 cups white sugar
4 tablespoons all-purpose flour
2 lemons, juiced

1.Preheat oven to 350 degrees F (175 degrees C).

2.In a medium bowl, blend together softened butter, 2 cups flour and 1/2 cup sugar. Press into the bottom of an ungreased 9x13 inch pan.

3.Bake for 15 to 20 minutes in the preheated oven, or until firm and golden. In another bowl, whisk together the remaining 1/12 cups sugar and 1/4 cup flour. Whisk in the eggs and lemon juice. Pour over the baked crust.

4.Bake for an additional 20 minutes in the preheated oven. The bars will firm up as they cool.   After bars have cooled, cut into uniform 2 inch squares.
 
**This post and photos are property of http://dishingwithdish.blogspot.com/ **

Wednesday, April 7, 2010

Marinara Chicken

Here is an extremely easy chicken dish that you can make in the crockpot.  I first heard about this from HickChickWA, and the dish originally comes from A Year of Slow Cooking.  This chicken will only taste as good as the marinara sauce you use, so use a good one.  I used Newman's Own Organic.  Homemade would be even better.  I also used frozen chicken breasts, and stirred in some fresh basil before serving.  We had this with thin, whole wheat spaghetti noodles.

Marinara Chicken

3-4 frozen boneless, skinless chicken breasts
1 jar (24-26 oz) marinara sauce
fresh basil, optional
shredded cheese, optional (mozz or parm)

Place frozen chicken into crockpot and top with marinara sauce.  Cook on LOW for about 8 hours, or on HIGH for 4 hours.  Turn off the heat, and stir in basil.  Serve over hot cooked pasta.  Garnish with shredded cheese.  Serves 3-4.

**This post and photos are property of http://dishingwithdish.blogspot.com/ **

Tuesday, April 6, 2010

Greek Lemon Turkey Orzo Soup

I've been wanting to make a Greek-style lemon orzo soup for a long time, and I finally did so last night!  We had a lemony roasted turkey for Easter, so I used the leftover turkey meat to make soup yesterday.  I also made my own rich turkey stock in the crockpot, using the turkey carcass, an onion, some garlic, bay leaves, and peppercorns.  It was soooo good, and so easy!  I cooked it on high for about 6 hours, and then strained the broth, discarding everything else, and refrigerated the broth overnight.  When I was ready to make this soup, I just skimmed the fat from the top of the broth and went to work! 

I think the homemade stock was the key to this soup being so super delicious.  I'm sure it's good with storebought too, so give it a try even if you don't have any homemade on hand!  This recipe calls for a lot of lemon juice, and I like that.  I found that 1 1/2 medium lemons gave me 1/3 cup of juice.  The whole fam loved this soup- even my two semi-picky eaters. 

(Oops, I see now as I'm posting this that the recipe calls for three eggs, and I only used two!  It was great with the two- I bet three would make it even more thick and creamy). 

Greek Lemon Turkey Orzo Soup
adapted from Dunkin Cooking

8 cups chicken/turkey broth or stock
1 cup orzo pasta (I used half white, haft whole wheat orzo)
10 oz. cooked turkey or chicken meat
3 eggs
1/3 cup fresh lemon Juice
1 tablespoon fresh lemon zest
1 tablespoon dried (or 2 TBS fresh) parsley
sea salt & fresh ground pepper, to taste
fresh snipped chives, optional, for garnish

1.  In a large soup pot bring the broth to a boil over medium heat.  Reduce heat to medium low and cook the orzo uncovered for about 15-20 minutes.  Five minutes before the pasta is done add in the chicken.

2.  Place the eggs into a mixing bowl.  Whisk the eggs while adding the lemon juice and zest.  Continue whisking and slowly stir a ladle of the broth into the egg mixture to temper the eggs (whisk quickly- so the eggs don't scramble).

3.  Reduce the broth heat to low and slowly stir in the egg mixture.  The soup will thicken slightly.  Add in the salt & pepper to taste and stir in the parsley.  Garnish with fresh chives. 

**This post and photos are property of http://dishingwithdish.blogspot.com/ **

Monday, April 5, 2010

Easter Brownie Bites

I didn't have time to post this recipe yesterday, but these little babies were our Easter dessert.  I wanted to do something like I did last year, but cuter.  Thinking of the brownie bites I made in January, I decided to use that brownie batter as the base of this recipe.  The brownie batter contains both white and brown sugar, and they are chewy and delicious.  Since I wanted to make little brownie cupcakes with frosting, I didn't include a peanut butter cup in them this time.  I just made brownies in my mini-muffin tin, frosted them with simple green butter frosting, and finally decorated each one with a Whopper speckled egg candy.  These were easy and fun to make, and gone in no time!!  This recipe made a ton too; about 50 brownie bites.  You'll have a bit of frosting leftover, but it's better to have too much than too little. 

Brownie Bites Batter
from Savory Sweet Life

3/4 cup butter, melted
3/4 cup white sugar
3/4 cup brown sugar, packed
2 teaspoons vanilla extract
2 eggs
3/4 cup all-purpose flour
1/2 cup unsweetened cocoa powder
1/2 teaspoon salt

1.  Preheat oven to 350 degrees F. Line mini muffin pan with mini paper liners.

2.  In a medium bowl, mix melted butter, sugars and vanilla. Beat in eggs one at a time. Gradually add flour, cocoa, and salt and mix until combined. Fill each paper liner about 2/3 full.

3.  Bake in preheated oven for 11-15 minutes or until done. Allow the brownie bites to cool for 5 minutes before removing from the muffin pan.


Butter Frosting
1/2 cup butter, softened
1 package (16 ounces) confectioner's sugar
2-4 tablespoons milk
1 1/2 teaspoons vanilla extract
green food coloring

Whopper egg candy, or any egg-shaped candy

1.  In large bowl, with mixer at medium-low speed, beat butter, sugar, 2-3 tablespoons milk, and vanilla until smooth and blended. Beat in additional milk as needed for easy spreading consistency. Increase speed to medium-high; beat frosting until light and fluffy, about 1 minute. Makes about 2 1/2 cups.

2.  Frost brownie bites.  I used my Wilton 1M tip to make the tops swirly.  Top with an egg candy very soon after frosting, before it sets. 
**This post and photos are property of http://dishingwithdish.blogspot.com/ **

Sunday, April 4, 2010

Happy Easter!

This year, we didn't buy one of those grocery store egg-coloring kits for Easter.  Instead, we used ingredients already in our pantry and produced some of the brightest, most beautiful eggs I'd ever seen.  We were in a hurry, so we only did four colors- red, yellow, blue, and green.  I'm excited to make new and different colors next year.  All you need for this is liquid food coloring, vinegar (I used cider vinegar) and boiling water.  Oh, and hard-boiled eggs.  :)  I followed the instructions on my McCormick food coloring box.  I also found the instructions online here

Easter Eggs
from McCormick

1 dozen large eggs
McCormick® Assorted Food Colors and Egg Dye
Vinegar

1.  Hard boil the eggs:  Gently place eggs in single layer in large saucepan. Add enough cold water to cover eggs by 1 inch. Cover. Bring just to boil on high heat. Remove from heat. Let stand 15 minutes. (Adjust time up or down by 3 minutes for each size larger or smaller.)

2. Pour off hot water and rapidly cool eggs by running them under cold water (or place in ice water) until completely cooled.

3. Mix 1/2 cup boiling water, 1 teaspoon vinegar and 10 to 20 drops food color in a cup to achieve desired colors. Repeat for each color. Dip hard-cooked eggs in dye for about 5 minutes. Use a slotted spoon, wire egg holder or tongs to add and remove eggs from dye. Allow eggs to dry.

**This post and photos are property of http://dishingwithdish.blogspot.com/ **

Saturday, April 3, 2010

A Portuguese Easter

Easter is a big holiday around here- there are many traditional celebrations and food items.  Here are just two I've noticed.  Pictured above are almond candies, or amĆŖndoas.  There are many different kinds- most are chocolate-covered almonds. My fave are the white-chocolate covered almonds; on the left.  The light purple ones are almonds coated in milk chocolate, then a candy coating, kinda like a huge almond M&M.  The pastel ones in the back are coated with a very hard, thick, sugar coating.  No chocolate, and I didn't realize this when I bought them.... or I wouldn't have.  Ha ha.  This coating is like a jaw-breaker coating, and I can't stand them.  Oh well.  We'll have to find someone to give them away to.  :)

Pictured below is some massa sovada bread with a cute little egg baked right into the loaf.  These are everywhere here right now- you can buy them with multiple eggs baked in, too.  We haven't actually tried this bread yet; I think I'll make french toast with it tomorrow.  I'm not sure what we'll do with that egg!  :)  (BTW, I was disappointed to see that this bread has margarine instead of butter...come on!!  It's supposed to be rich with butter, not margarine!)
**This post and photos are property of http://dishingwithdish.blogspot.com/ **

Friday, April 2, 2010

Yogurt Fruit Salad

Here is a recipe I've made many times, but have never taken a photo and blogged about it.  It's the simplest fruit salad, too.  Just take whatever fresh fruits you have on hand, mix some vanilla yogurt in, and top it off with a sprinkle of cinnamon and some chopped walnuts.  It's best when you can throw some berries in (I love strawberries in it), but the other day when I made this, I only had apples, bananas, and grapes on hand, so that's what I used.  Add more fruits if you want- this amount makes enough for about 4 servings. 

I like to use the vanilla Greek-style yogurt I buy in the Portuguese grocery stores for this. (So, that would be Portuguese-Greek-style yogurt.  Ha ha).  It's less sweet than most American yogurts, and deliciously creamy.  (Um.... that could be because there's actually cream in the ingredients..... right after the full-fat milk.... don't judge me). 

Yogurt Fruit Salad
adapted from Allrecipes

1 large apple, cored and diced
1 large banana, sliced
1 cup grapes, washed, drained
other fresh fruit, if available
1 cup (or more, if needed) vanilla yogurt
1/2 teaspoon ground cinnamon
2/3 cups walnuts, chopped

Place the chopped fruits into a large bowl.  Add the yogurt, and toss gently to coat fruit.  Sprinkle the top with cinnamon and walnuts, and serve. 

**This post and photos are property of http://dishingwithdish.blogspot.com/ **

Thursday, April 1, 2010

Chicken Tikka Masala

The whole family loved this dish- even my three-year old was using his naan bread to get every last bit of sauce from the pan.  This recipe was brought to my attention by Hick Chick, so thanks!  ;)  It was simple to prepare and rich with flavor.  I added a few shakes of Garam Masala... I love that stuff and couldn't help myself.  We ate this over rice, with sauteed ginger-aspagarus on the side, and grilled naan bread.  Ohhhhh, yeah!! 

Chicken Tikka Masala
adapted from Mel's Kitchen Cafe

1 cup plain yogurt
1 tablespoons lemon juice
2 teaspoons ground cumin
1 teaspoon ground cinnamon
2 teaspoons paprika
1 teaspoons black pepper
1 tablespoons minced fresh ginger
1/2 teaspoon salt
3 boneless, skinless chicken breasts, cut in half

Combine all ingredients except chicken. Pour sauce over chicken and refrigerate for one hour. Grill chicken on an outdoor grill, until done.  If that is not available, you can also cook the chicken on a skillet.  Discard marinade.

1 tablespoon butter
1 clove garlic, minced
1 jalapeno pepper finely chopped
2 teaspoons ground cumin
2 teaspoons paprika
1/4 teaspoon Garam Masala, optional
1/4 teaspoon salt
1 8-oz can tomato sauce
1 cup cream
1/4 cup chopped cilantro

Melt butter in large skillet over medium heat. Saute garlic and jalapeno for one minute. Season with cumin, paprika, garam masala,  and salt. Stir in tomato sauce and cream. Simmer on low heat until sauce thickens, about 15-20 minutes. Add grilled chicken and simmer for 5-10 minutes. Garnish with fresh cilantro. Serve over hot rice.

**This post and photos are property of http://dishingwithdish.blogspot.com/ **