Monday, July 23, 2012

Cheesy Garlic Bread Sticks

These were soooo good.  And so easy to make, too.  The delicious-looking pic in the original post got me to makin' these as soon as I could.  Thanks to a friend for pinning this on Pinterest!  I made the full dough amount and am freezing the other half for use later. 

You use a pizza stone and shape the bread on parchment so you can slide it right onto the super-hot pizza stone.  Loved the results- just perfect, crisp crust.  I can't wait to make this again!  The whole fam loved this and inhaled it, of course.


Cheesy Garlic Bread Sticks
adapted from Lauren's Latest

Dough:
1 cup warm water
2 1/4 teaspoons active dry yeast
1 tablespoon honey {or sugar}
2 teaspoons salt
2 tablespoons olive or canola oil
3 cups bread flour (give or take 1/2 cup…depending on humidity)

1.  In a large mixing bowl, preferably that of a stand mixer, stir yeast and honey into warm water. Sit for 5-10 minutes or until bubbles form and mixture starts to foam.  Pour in salt, oil and half the flour and mix.  Once that flour is incorporated, start adding flour in bit by bit until you get the pizza dough to the consistency you want: slightly tacky, but when you touch it it doesn’t stick to your hands.

2.  Once you reach this stage, turn the mixer on high to knead for about 6 minutes.  The dough should be smooth and easy to work with. And the bowl should be clean.  Lightly grease the bowl & the dough so it doesn’t dry out, cover with plastic wrap and let it rise 1-2 hours.

Cheesy Garlic Bread Sticks

1/2 recipe Pizza Dough (above- use whole recipe for 2 "loaves")
2 tablespoons softened salted butter
2 cloves garlic, finely minced
1/4 cup grated Parmesan cheese
1/2 cup grated mozzarella cheese

1.  Preheat oven to 500 degrees , or as hot as it will go with pizza stone inside.  (Mine only does 425-450.) (If you don’t have a pizza stone, use an upside down cookie sheet).

2.  Mix butter and garlic in a small bowl and set aside.  Spread pizza dough out into a 12-inch circle on parchment paper.  Spread the butter and garlic mixture over dough and top with Parmesan and mozzarella cheeses. Bake 9-10 minutes or until bubbly and golden. Remove from oven and cool 1-2 minutes before cutting. Serve hot, with marinara.
**This post and photos are property of http://dishingwithdish.blogspot.com/ **

Saturday, July 21, 2012

Easy Raspberry Ice Cream (Soft-Serve Style)

I've been having so much fun using frozen berries lately, obviously!  I just can't stop.  This recipe is so easy and fun; you just need a blender or big food processor.  I used my blender, since I don't think my processor could hold everything.  You combine frozen raspberries, some strawberries, cream and sugar, and blend it up!  It turns into something between soft-serve ice cream and a milkshake- so good!  My frozen raspberries must have been really sweet; I used 2/3 cup sugar (cut down from 1 cup) but it was too sweet still.  I'd start with 1/3 to 1/2 cup sugar next time, and then add more to taste. 

Easy Raspberry Ice Cream
adapted from Taste of Beirut

1 bag frozen raspberries (12 oz or 340 grams)
1 cup frozen strawberries
1 cup whipping or light cream (I used light cream)
1/3 cup- 2/3 cup sugar, depending on taste
handful of fresh raspberries for garnish

1.  Combine all ingredients in blender or food processor except fresh raspberries.  Blend until very smooth and creamy.  (Add sugar to taste- starting with 1/3 or 1/2 cup and adding more if needed).  Serve right away, garnished with fresh raspberries, or freeze for one hour and then serve, garnished with fresh raspberries.  We served right away.  :) 

**This post and photos are property of http://dishingwithdish.blogspot.com/ **

Friday, July 20, 2012

Dad's Chocolate Chip Cookies

My daughter and I made these together for her blog.  My Dad has been making them for years.  They are thick, chewy, and delicious.  My whole family reaaaaally liked these.  Actually, my daughter made them for ice cream sandwiches, and it was hard keeping everyone out of them to save enough to make the sandwiches!  I wanted to use milk chocolate chips in these, but didn't have any, so I used a mix of mini semi-sweet chocolate chips and some good-quality, chopped milk chocolate (from a Ritter Sport bar).  This recipe is HUGE!!  It makes a ton.  We cut it in half when we made it. 


Dad's Chocolate Chip Cookies
from my Dad

2 cups butter, softened
2 cups brown sugar
2 cups white sugar
2 teaspoons vanilla
4 eggs
5 cups flour
3 cups oatmeal (quick oats)
1 teaspoon salt
2 teaspoons baking soda
2 teaspoons baking powder
2 (10-12 oz) package chocolate chips
1 1/2 cups chopped walnuts or pecans, optional

1. Preheat oven to 400 F. Mix butter, sugars, vanilla and eggs. Mix well until smooth. Add flour, salt, baking soda, baking powder, and oatmeal. Mix in. Stir in chocolate chips and nuts. Shape into golf ball size balls and mash down slightly on lightly greased cookie sheet. Bake 6-8 minutes. Do not over bake. Makes about 6 dozen.

**This post and photos are property of http://dishingwithdish.blogspot.com/ **

Wednesday, July 18, 2012

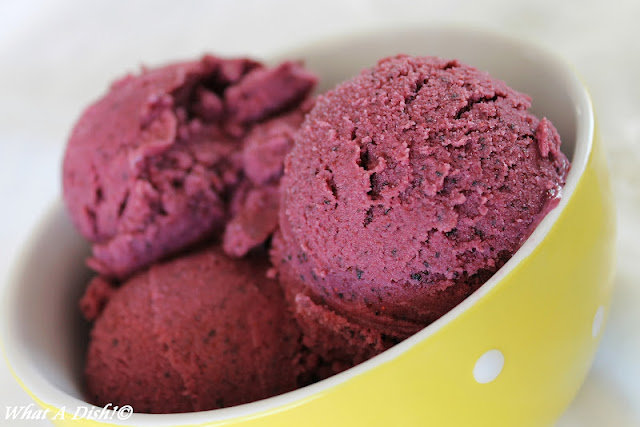
Blueberry Frozen Yogurt

I loved this- pretty easy, and great results!  You can't go wrong with a David Lebovitz frozen treat recipe.  The hardest part to this is straining out the blueberry seeds.  I wouldn't skip that part; it makes for a nice and smooth frozen yogurt. 

I used frozen blueberries for this- didn't even bother to thaw them first.  My processor can handle it.  :)  Instead of the 1 teaspoon of kirsch, I used one teaspoon of my homemade vanilla extract, which is made with white rum.  A little bit of alcohol helps prevent crystallization in ice cream and fro yo recipes.  (Yes, I just said Fro Yo!) 

Blueberry Frozen Yogurt
adapted from The Perfect Scoop, via Home Cooking w/Sonya

1 1/2 cups (360g) whole milk Greek yogurt
3/4 cup (150g) sugar
3 cups (340g) blueberries, fresh or frozen
1 tsp. vanilla extract or kirsch
2 tsp. fresh lemon juice

1.  In a blender or food processor, blend the yogurt, sugar, and blueberries until smooth.  Using a rubber spatula, press the mixture through a mesh strainer into a bowl to remove the seeds.  Stir in the vanilla extract or kirsch and lemon juice.  Chill for one hour (I chilled overnight). 

2.  Freeze in your ice cream maker according to manufacturer's directions.

3.  Transfer to a container to freeze for later consumption, or eat right away for soft-serve. 


**This post and photos are property of http://dishingwithdish.blogspot.com/ **

Fried Pickles + Homemade Buttermilk Ranch

Ever since trying fried pickles at a Texas Roadhouse with my sister and her husband two years ago, my daughter has been begging me to make fried pickles.  I hate frying things, and plus, it's so bad for you, so I never complied, until just recently.  I know I'm bad, but I re-used the oil from Navajo Tacos to fry these babies.  It worked out perfectly, and these were really good!  (I made these a while ago; I didn't wait that long to re-use the oil!)  I found a great recipe from Homesick Texan.  I did not have any saltines on hand, so I used Panko bread crumbs.  I also used pre-sliced pickles to save time.... but slicing a few pickles would have been the least of my concerns, time-wise, with this recipe!

My daughter started her own cute little blog and has made quite a few recipes on her own.  She made a Buttermilk Ranch a while ago that I thought would go just perfect with these, so I asked her to make it again to use for dipping.  The combo was great!  And now, I'm done frying things for a really long time.  ;)  I saw a recipe for oven-fried pickle chips yesterday.... but the dredging of these little guys was so time-consuming!


Fried Pickles
adapted from Homesick Texan
3-6 Servings

2 cups dill pickle chips
1 cup flour
1/2 teaspoon salt
1 teaspoon black pepper plus more to taste
1 egg
1/2 cup buttermilk
2 cups Panko bread crumbs
1/2 teaspoon cayenne (or to taste!)
1/2 teaspoon dried dill weed
Salt to taste
Oil for frying

1.  In a large, shallow bowl, mix together the flour, salt and black pepper. Dredge the pickle chips in the mixture until they are well coated.

2.  Mix together the eggs with the buttermilk. Place the Panko crumbs on a plate and mix in the cayenne and dill weed. In batches, dip the flour-coated pickles into the eggs and then lightly dredge in the Panko. Place Panko-coated pickles on a large baking sheet. Repeat until all the pickles are coated.

2.  In a large, heavy skillet, heat 1/2 inch of oil on medium heat until it reaches 350 degrees. Fry the pickles for one minute or until golden brown, turning once. You will have to do this in several batches-do not crowd the pan. Drain on paper towels.  Serve immediately with Ranch dressing (recipe below).

My Daughter's Buttermilk Ranch Dressing
adapted from A Little Side Dish

1 cup buttermilk
6 tablespoons mayo
2 teaspoons lemon juice
sprinkle paprika
1 teaspoon fresh or dried dill, snipped
1 tablespoon fresh parsley, snipped
1/2 teaspoon garlic salt
1/4 teaspoon Dijon mustard

1.  Mix all ingredients together and store in a covered container in the fridge. 

**This post and photos are property of http://dishingwithdish.blogspot.com/ **

Monday, July 16, 2012

Frozen Raspberry Lemonade

We LOVE this recipe- it is SO good!  I saw it on Pinterest and made it pretty soon after; it's so easy to make and I had everything on hand!  I changed it a bit; instead of 1.5 cups of frozen raspberries I just use a whole 12 ounce bag, and I only throw in a handful of ice cubes (my blender is too full by then to fit much more than that!)  This makes enough for the whole fam, and it's much cheaper than one Jamba Juice.  :)

I made this two days in a row!  I plan on trying other combos later; will come back and report!  Both days, we enjoyed these out on our back porch with a picnic dinner. 

Frozen Raspberry Lemonade
adapted from Delightfully Tacky

1 can frozen lemonade concentrate (12 oz, I believe)
1 12 oz package frozen raspberries
1 can of water (12 oz)
handful of ice cubes

1.  Combine all ingredients in your blender and blend until smooth.  Stop a few times to stir around.  Serve immediately.
**This post and photos are property of http://dishingwithdish.blogspot.com/ **

Sunday, July 15, 2012

Chewy Coconut Cookies

I love these cookies- I made them a couple times back in 2005 or so and I just busted out the recipe again recently; I needed something to take to a book club.  They come together quickly and I love how they taste.  You could even add lime zest to make a coconut & lime cookie!  ;)  I've always used sweetened coconut, but one could make them less sweet by using unsweetened coconut.
Chewy Coconut Cookies
adapted from Allrecipes
makes about 3 dozen

1 1/4 cups all-purpose flour
1/2 teaspoon baking soda
1/4 teaspoon salt
1/2 cup butter
1/2 cup packed brown sugar
1/2 cup white sugar
1 egg
1/2 teaspoon vanilla extract
1 1/3 cups flaked coconut

1.  Preheat oven to 350 degrees F (175 degrees C.) Combine the flour, baking soda, and salt; set aside.

2.  In a medium bowl, cream the butter, brown sugar, and white sugar until smooth. Beat in the egg and vanilla until light and fluffy. Gradually blend in the flour mixture, then mix in the coconut. Drop dough by teaspoonfuls onto an ungreased cookie sheet. Cookies should be about 3 inches apart.

3.  Bake for 8 to 10 minutes in the preheated oven, or until lightly toasted. Cool on wire racks.


**This post and photos are property of http://dishingwithdish.blogspot.com/ **

Saturday, July 14, 2012

Smoked Salmon Primavera with Squid Ink Pasta

Using this pasta was interesting.  Actually, just the looks of it really grossed me out.  It reminded me of black shiny millipedes we have here.  But my husband loved it!  Actually, he picked it out at the store once when we were shopping together.  I never would have bought this on my own, lol!  I made this for Father's Day for my husband since he was so excited about the black pasta AND he loves smoked salmon.  This recipe is just from the back of the smoked salmon box.  It was good and easy.

Unfortunately, Father's Day this past month was not so good to us.  Our van was broken down.  We had my husband's old car and another little car we were borrowing.  On the way to church, my husband's car broke down.  I had to drop some kids off with friends at church and go pick him up.  On the way home, someone else offered us their van that they didn't currently need.  Unbeknown to us, the van was having problems, and died when my husband was driving it home!!  (I was already at home; having taken the other car).  It didn't break down far from our house, but still... after all of that, my husband had to walk home.... on Father's Day! 

But at least he could enjoy this pasta when he finally did get home that day. 

By the way, the pasta smelled "seafood-ish" when I opened up the package, but after cooking, tasted just like regular, white pasta.  I think I'll save the rest to use at Halloween or something!
Smoked Salmon Primavera with Squid Ink Pasta
adapted from Portlock Wild Smoked Salmon

1 lb (or less) of Squid Ink pasta, or pasta of choice
3 tablespoons olive oil
1/2 lb fresh snow peas
1 roasted red sweet pepper, but into strips (or equivalent from jar)
8 oz. smoked salmon
1 cup light cream
1/2 cup grated Parmesan cheese
2 tablespoons parsley

1.  Cook pasta according to package directions.

2.  Meanwhile, heat olive oil, add garlic, snow peas, sweet pepper, and cook for one minute.  Add the cream and bring to a simmer.  Add pasta to cream sauce and gently combine with salmon, cheese, and parsley.  Serve warm.

**This post and photos are property of http://dishingwithdish.blogspot.com/ **
Friday, July 13, 2012

Pistachio Brownies

Here is another delicious recipe from Taste of Beirut blog.  The middle layer is pistachio paste combined with cream cheese.  You can make your own pistachio paste, but I was making an order to Nuts.com anyway, so I just ordered some of it.  I'd like to try making my own next time, though! 
The brownie batter is just a regular brownie batter (it's very good on its own and smells delicious!)  Then you glop on the pistachio cream cheese, more brownie batter, and bake. 
My container of pistachio paste contained enough for two batches of these brownies, so I made them twice, in the space of a few weeks.  The whole family loved them- I thought the kids might not want to try them, but they did, and loved them.  Actually, the second time I made them, my 5-year old sat on a kitchen stool in front of the oven, waiting for them to finish baking. 


Pistachio Brownies
adapted from Taste of Beirut

Brownie Layer:
2 large eggs
3/4 cup (spoon into measuring cup) all-purpose flour
1/2 teaspoon of baking powder
dash of salt
4 ounces of unsalted butter
4 ounces of semisweet chocolate
1 tablespoon of cocoa powder
1 teaspoon of vanilla extract
3/4 cup of sugar

Pistachio Cream:
3 ounces cream cheese
4 1/2 ounces of pistachio paste, purchased or homemade (recipe- scroll down)
1 large egg

1.  Melt the butter and chocolate over low heat in a small, heavy saucepan on the stove. Set aside. Mix the flour, cocoa powder, salt, baking powder.

2.  In a large bowl, mix the eggs and 3/4 cup of sugar until the mixture is thick and pale yellow, about 5 minutes. (I used my KitchenAid).  Add the melted chocolate and butter mixture and vanilla. Mix well. Add the flour mixture and mix to combine.

3.  In a food processor bowl, place the cream cheese, pistachio paste and egg. Process until the mixture is smooth, about 2 minutes. In an 8 inch brownie pan, place a piece of parchment paper.
Pour half the brownie batter, then all of the pistachio batter by spoonfuls; pour the remaining brownie batter over top. Bake in a 350F oven for 20 to 25 minutes, until puffed. Test the cake with a toothpick. Cool and serve.

**This post and photos are property of http://dishingwithdish.blogspot.com/ **

Wednesday, July 11, 2012

Roast Chicken with Lemon & Olives


This is from a North African cookbook.  The dish is actually supposed to be a boiled chicken dish, and I didn't realize that when I went to make the recipe the first time.  I thought the dish wouldn't be as flavorful all simmered together, but I made the recipe as directed anyway.  Well.... it was ok, but nothing to write home about, and it was a little ugly, too, so it didn't make nice pictures.  I decided to do it again, roasting it like I had thought in the first place, and I loved it!  Our whole family loves, loves, loves whole roasted chicken!

I did use preserved lemons the first time I made this, and I actually made my own!  Here is the method.  However, I didn't really like the taste of the preserved lemons.... for some reason, they tasted kind of pine-sol-y to me.  So when I made this the second time, I just served it with fresh lemons. 
Lemon Chicken with Lemon & Olives (Poulet M'charmel)
adapted from The North African Kitchen

1-2 onions, finely chopped
3 -4 garlic cloves, crushed
1 bunch fresh cilantro, finely chopped
1 bunch fresh flat leaf parsley, finely chopped
1 teaspoon ground ginger
1 teaspoon ground cumin
1 teaspoon black pepper
2 lemons, juiced
1/4 cup extra virgin olive oil
1/4 cup water
1 roasting chicken
1 preserved lemon, finely sliced, OR a fresh lemon, sliced
5 1/2 ounces olives (purple and green variety)

1.  Preheat oven to 350.  Mix onion, half the cilantro and parsley, the spices, salt and half the lemon juice and olive oil. Dilute with water to make a sauce.  Rub some of the sauce over the outside of the chicken.  Place chicken in a large roasting pan.  Pour the rest of the mixture around the chicken.


2.  Roast for about 1 1/2 hours or until meat reaches 180 F on a thermometer or chicken juices run clear.  When chicken is cooked through, add the remaining cilantro and parsley and pour over the remaining lemon juice. Leave to simmer for a few more minutes to thicken the sauce.  Arrange chicken on a dish and garnish with slices of preserved lemon and olives.

**This post and photos are property of http://dishingwithdish.blogspot.com/ **

Tuesday, July 10, 2012

Lemon-Blueberry Drizzle Bread


I made this bread quite a while ago, but am backed up on recipes to share.  I actually made it twice, because I messed up the drizzle glaze the first time (pic below).  It still tasted good though!!  The first time I made it, I brought it to a potluck and hardly got any, so I had to make it again.

This is more of a cake, and it's perfect for summer with the use of lemons and blueberries.  However, fresh blueberries are reserved for just eating out of hand at our house, if we can get them, so I used frozen in this recipe and did not thaw them first (they'd bleed terribly into the batter if you did). 
Lemon-Blueberry Drizzle Bread
adapted from Portuguese Girl Cooks

1 1/2 cups (7 1/2 oz/235g) all purpose flour, plus 1 teaspoon for blueberries
1 teaspoon baking powder
1/2 teaspoon kosher salt (or slightly less table salt)
1/2 cup (4oz) unsalted butter, room temperature
3/4 cup (6oz/ 185g) granulated sugar
1 tablespoon finely grated lemon zest
3 large eggs
1/2 cup (4fl oz/125ml) milk
1 teaspoon pure vanilla extract
1 cup (4oz/125g) fresh or frozen blueberries

For the Syrup:
4 tablespoons fresh lemon juice
4 tablespoons granulated sugar

For the Glaze:
1/2 cup (2oz/60g) confectioners sugar
about 1 tablespoon fresh lemon juice

1. Preheat oven to 350 degrees F, and adjust rack to the middle position. Butter and flour a 8-by-4-inch loaf pan.

2. In a small bowl, whisk together the flour, baking powder, and salt. Set aside.

3. In the bowl of a stand mixer fitted with the paddle attachment, beat the sugar, butter, and lemon zest on medium-high speed until light, about 3 minutes. Add in the eggs one at a time, until each one is incorporated. Add in the milk and vanilla extract, and beat until well blended, about 1 minute. Add the dry ingredients and beat until just incorporated.

4. In a small bowl, toss clean blueberries with the 1 teaspoon of all-purpose flour. Gently fold the blueberries into the batter. Scrape the batter into the prepared loaf pan.

5. Bake until the top is lightly browned and a toothpick inserted comes out clean, about 40 to 55 minutes. (this will depend on the size of your loaf pan). Allow bread to cool in pan for a few minutes then turn onto cooling rack.

6. While the bread is baking, make the lemon syrup. In a small saucepan, measure lemon juice and sugar, and bring to a boil over medium-high heat, until all the sugar is dissolved and the syrup has thickened slightly, about 2 minutes.

7. Using a skewer, poke the top of the bread all over. Make a lot of holes; you want all the syrup to go into the bread so it will be nice and moist. Brush the bread generously with the lemon syrup. Allow the bread to cool completely, about 2 to 3 hours.

8. To make the glaze: In a small bowl, mix the confectioners sugar and lemon juice, and whisk to combine. Add more or less lemon juice or sugar to get a drizzle-able consistency.  When bread is completely cool, drizzle the top with the glaze.
**This post and photos are property of http://dishingwithdish.blogspot.com/ **

Sunday, July 8, 2012

Summer Flower Pots

For these edible flower pots, I took an idea from "Dirt Cake" to use up some crumbled cookies from a birthday cake I had made kind of recently.  (I made this one, again.  So I had crumbled up oreos, Filipino cookies, and chocolate grahams.)  I made my favorite homemade, easy chocolate pudding, set it in these cute little silicone baking cups (that looks like pots), and sprinkled the "dirt" on top.  Then I set them in the fridge for the pudding to firm up a bit. 

The little "seeds" on top are All-Natural Chocolate-Covered Sunflower seeds, from Nuts.com (LOVE Nuts.com!!!!  They have everything and ship so fast!  The food coloring in these comes from veggie juices, no fake food coloring here).  And the tulips and leaves are just gum drops (not all natural, lol!) smashed flat with the bottom of a drinking glass, with notches cut out of the top for the tulips, and the leaves are just a flat one cut in half.  You put the tulip together on a toothpick, and when the pudding has firmed up some (a few hours), you can stick the flower in. 

The kids loved these!!!  I admit they tasted pretty good to me, too.


Flower Pots
by What a Dish!


1/2 cup white sugar
3 tablespoons unsweetened cocoa powder
1/4 cup cornstarch
1/8 teaspoon salt
2 3/4 cups milk (skim or 1% milk will work)
2 tablespoons butter
1 teaspoon vanilla extract

Other ingredients:
chocolate-covered sunflower seeds
colored gum drops (sugar-coated)
toothpicks, preferably green ones

1.  Make the pudding:
In a saucepan, stir together sugar, cocoa, cornstarch and salt. Place over medium heat, and stir in milk. Bring to a boil, and cook, stirring constantly, until mixture thickens enough to coat the back of a metal spoon. Remove from heat, and stir in butter and vanilla.  Immediately pour warm pudding into the "flower pots".  Refrigerate.

2. Make the dirt:
Process cookies of your choice... a mix of dark and light colors (Oreos, choc-covered ones, etc) in the food processor until crumbled up and looking like dirt.  Carefully make a layer of dirt on top of the pudding in each pot. 

3.  Make the tulips:
Flatten gumdrops as flat as possible with the bottom of a drinking glass.  Cut out two small V-shaped notches in the top of each one to resemble a tulip.  Flatten green gum drops, and cut each in half.  Each half will be the leaf for one tulip.  Thread the leaves through a toothpick and stick the flower on top of each toothpick.

4.  When the pudding has been in the fridge for a few hours, add a few chocolate-covered sunflower seeds to each pot.  Stick a flower in each one, and serve!

**This post and photos are property of http://dishingwithdish.blogspot.com/ **

Saturday, July 7, 2012

Queso Blanco Dip

I've spotted various white cheese dip recipes on the internet in the past year or so, and they all sparked my interest and made me want to make some!  Almost every recipe I've seen calls for melted white American cheese, and I really didn't want to use that, so I never actually made any of those recipes.  Then, they started selling Mexican Asadero cheese at my local store, so I bought some and finally found a recipe online for white cheese dip, using Asadero instead of white American!  I was so happy! 

This particular recipe is also different in that it uses a white sauce (bechamel).  That's the base of every Mac & Cheese recipe I make, so I am very good at making it!  (We have way too much mac and cheese around here....)  This recipe was so easy.  I actually made it for dinner after a long day at the pool, and we had this dip with chips, and some fruits and veggies on the side.  Everyone loved it!  The kids just ate it up.  It was so good!  I used pickled jalapenos and only put a little bit in; next time I would add more.  Actually, next time I think I'll use a mix of sharp cheddar and pepper-jack cheese.  I loved the Asadero in here, but I would like more of a kick, and plus, the Asadero was kind of expensive!  Lol. 

Two years ago I made a yellow Chile con Queso dip... which we all loved, as well!
Queso Blanco Dip
adapted from Rockin' Robin's Mexican Recipes

1/2 yellow onion, finely chopped (I omitted this because of time)
3 cloves garlic, minced
2 tsp. olive oil
1/4 cup butter
1/4 cup white flour
2 cups milk
1 tsp. ground cumin
4 oz. canned chopped green chiles, drained
2 fresh jalapeno peppers, seeded, deveined, and finely chopped OR similar amount pickled jalapenos
10-12 oz. monterey jack OR Mexican asadero cheese, shredded
salt to taste
fresh ground pepper to taste

1.  In a small skillet, saute onion in olive oil for 5 to 10 minutes over medium heat. Stir frequently to prevent burning.  Add the garlic, reduce the heat to low, and cook for 5 min. Set aside.

2.  In a 2 quart sauce pan, melt the butter over very low heat.  Once the butter is just melted, add the flour and stir with a whisk to blend it together.  Turn the heat up just a little bit so that you can see the flour/butter mixture slightly bubbling. Stir constantly for 1 minute.  Now add a little milk while continuing to stir with the whisk. Add the rest of the milk and turn the heat up to medium.  Continue to whisk for about 5 to 10 minutes. You will notice the sauce thickening.

3.  Turn the heat down just a little and add the cumin, onion and garlic mixture, the green chiles, and the jalapenos. Stir until well mixed and hot.  Add a pinch of salt and pepper and stir.
 
4.  Turn off the heat and add the shredded cheese, one handful at a time.  Stir each handful in with the whisk until melted. Keep adding handfuls and stirring until all the cheese is mixed in and creamy.  Serve immediately.

**This post and photos are property of http://dishingwithdish.blogspot.com/ **

Friday, July 6, 2012

Cornstarch Sidewalk Paint

I'm so glad I came across this "recipe" for sidewalk paint.  It's just equal parts cornstarch and water, mixed with food colorings.  You paint it on the sidewalk, and the rain washes it away.  After it dries, it looks pastel, and like sidewalk chalk.  My kids LOVED it!!  They painted with it for over an hour.  Just don't let it sit too long, or it kind of turns to that Ooblek stuff, but a firm stir with a wire whisk can make it right again. 

BTW, this paint is a good thing to occupy my rusty old dollar-store muffin tin, lol!  Yes, I do use it for baking cupcakes in sometimes, IF my normal one is filled, but ONLY with paper liners!  ;) 

Cornstarch Sidewalk Paint
from Sophistimom

1 cup water
1 cup cornstarch
food coloring

1. Combine water and cornstarch with a whisk. Pour the mixture into separate muffin cups. Add food coloring to each. We made purple, orange, yellow, green, pink, blue and gray (not shown).  Mix each paint color with a paintbrush and go paint outside! 

Thursday, July 5, 2012

Middle Eastern Cheese Rolls

These come from one of my favorite blogs, Taste of Beirut.  They were so fun to make- the kids all helped cut out the rolled dough with a drinking glass.  I made some filling without onions for them, too, but I really enjoyed the onion flavor, myself.  I cut down on the cheese by a little bit in the recipe.  We had these with soup.  If there is any leftover cheese filling, it is wonderful as the filling in a warm, oven-toasted sandwich.
Middle Eastern Cheese Rolls
adapted from Taste of Beirut

Dough:
2 1/2 cups all-purpose unbleached flour
1/4 cup olive oil
1 teaspoon salt
1 Tablespoon yeast
1 teaspoon baking powder
1 teaspoon sugar
6 ounces warm water

Filling:
8 ounces shredded white cheese (mozzarella, akkawi or other)
6-8 ounces Feta
1 cup fresh minced parsley
1/2 cup minced onion
1 teaspoon allspice
2 large egg whites
1 large egg yolk (to shine the crust)

1.  Proof the yeast by mixing in a little bit of warm water with the teaspoon of sugar; let it bubble up for 5 minutes. In the meantime, place the flour, salt and baking powder in the bowl of a food processor; add the oil and use the dough hook attachment to mix until the oil is well-combined with the flour; add the yeast and water mixture and add another 1/2 to 3/4 cup of warm water to the bowl. Knead until the dough leaves the sides of the bowl and is compact and moist. Transfer the dough to a work surface, sprinkle some flour on it, knead briefly for a few seconds and place in a greased bowl, covered with a towel, in a warm place for one hour to rise.

2.  Prepare the filling: place the chopped onion on a sieve, sprinkle with a dash of salt and let it drain its water; shred the cheeses and add the parsley, egg whites, spices and drained onion. Mix well to combine. Set aside until the dough has risen. Transfer the dough at this point to the work surface and roll out into a large circle. Cut rounds with a cookie cutter or the rim of a drinking glass. Place a tablespoon of cheese filling on each round and pinch the ends to form a little boat. Brush with a little beaten egg yolk to have a shiny crust.

3.  Place on a cookie sheet with a silpat or parchment paper; let the rolls set for thirty minutes to rise.  Meanwhile, preheat the oven to 375F. Bake for about 12 minutes or until the rolls are golden. Serve warm.

**This post and photos are property of http://dishingwithdish.blogspot.com/ **

Wednesday, July 4, 2012

Red, White & Blue Yogurt Pops

Happy 4th of July!  Thanks to a newsletter from Food.com I got last night, I was able to whip up these yogurt pops quickly last night and stick them in the freezer for today.  The store was out of vanilla yogurt (I usually buy some), so I just got plain and raspberry flavored, and that's what I used in these.  The pink layer is raspberry with a bit of red food coloring added.  (I only use food coloring for birthdays and holidays!)  Then I sweetened plain yogurt with agave nectar and made the white layer.  I then sweetened more plain yogurt with agave and colored it blue for the last layer. 

You can put all of these layers in at the same time; they stay separate.  I got these cool rocket pop molds from Amazon.  I didn't measure the yogurt when making this; I'll include the original recipe from Food.com, even though I just used it as a rough guide.

Red, White & Blue Yogurt Pops
adapted from Food

raspberry yogurt, 1/2 to 1 cup
vanilla or plain yogurt, 1 to 2 cups
agave nectar or honey, if using plain yogurt
red and blue food coloring

1.  If desired, tint the raspberry yogurt with some red food coloring.  Fill the bottoms of popsicle molds with the raspberry yogurt.

2.  If using plain yogurt, sweeten with agave nectar or honey, and make a white layer on top of the red in each popsicle mold.  Sweeten more yogurt, and tint blue with the blue food coloring.  Add blue as the last layer in the popsicle molds. 

**This post and photos are property of http://dishingwithdish.blogspot.com/ **

Tuesday, July 3, 2012

Strawberry-Blueberry Freezer Jam

I've already made two batches of freezer jam this summer; regular strawberry, and more recently, this Strawberry-Blueberry combination.  I really loved this one.  It's the first time I've been able to do blueberry successfully- I just didn't know what I was doing before, I think. 

I love eating this with plain Greek yogurt- shown above.  I always eat it with my granola, too.  It's always good on waffles or pancakes, as well, or just plain toast.

Yes, this jam has a lot of sugar, like many freezer jams.  I recently found some other pectin and it appears one can use less sugar with that, but I haven't used it yet.  My mom was nice enough to send me some SureJell pectin, and I've been happily using that.  So SureJell is what this recipe calls for.  If you want to make it with another brand, find another recipe, because this one probably won't work with another brand of pectin. 

Strawberry-Blueberry Freezer Jam
from Kraft

1-1/2 cups crushed fresh strawberries (measured after crushing)
cup crushed blueberries (measured after crushing)

4-1/2 cups sugar
3/4 cup water
1 pkg. SURE-JELL Fruit Pectin (yellow box)

1.  Rinse 6 clean (1-cup) (or 3 clean 2-cup) plastic containers and lids with boiling water (or wash in top rack of dishwasher). Dry thoroughly. Mix fruit in large bowl. Stir in sugar. Let stand 10 min., stirring occasionally. 

2.  Mix water and pectin in small saucepan. Bring to boil on high heat, stirring constantly. Cook and stir 1 min. Add to fruit mixture; stir for 3 min. (A few sugar crystals may remain.) 
   
3.  Fill all containers immediately to within 1/2 inch of tops. Wipe off top edges of containers; immediately cover with lids. Let stand at room temperature 24 hours. Refrigerate up to 3 weeks or freeze up to 1 year. (If frozen, thaw in refrigerator before using.)    


**This post and photos are property of http://dishingwithdish.blogspot.com/ **

Monday, July 2, 2012

Shredded Chipotle Beef for Tacos (or Burritos)

This is an easy, yummy recipe for shredded taco meat.  We enjoyed these with tacos first, and the next day, I combined the rest of the beef with a can of refried black beans for bean and beef burritos.  I enjoyed both dinners very much.  This is made in the slow cooker, which I love.  You sear the meat first to lock in flavor.  It's not that much of an extra step; don't skip it! 

Shredded Chipotle Beef for Tacos (or Burritos)
adapted from My Kitchen Addiction

1-2 tablespoons extra virgin olive oil
2 pounds beef (boneless rump roast)
1 teaspoon chili powder
1/2 teaspoon cumin
1/2 teaspoon smoked paprika
1 cup beef stock
1 tablespoon tomato paste
1 chipotle pepper in adobo sauce, minced
1/2 large sweet onion, diced
3 cloves garlic, minced
juice of one lime
Flour tortillas
Favorite taco toppings – lettuce, tomato, onion, avocado, lime, cilantro, etc.

1.  Heat the olive oil in a large, heavy skillet over medium-high heat. Meanwhile, combine the chili powder, cumin, and smoked paprika in a small bowl.  Rub the spice mix into the beef, covering each side evenly. Once the oil is hot (it will shimmer a bit in the skillet), place the beef in the skillet and sear on each side

2.  Remove the beef from the skillet and place in the bottom of a slow cooker. Leave the pan on the heat, and deglaze the pan with the beef stock, scraping up any browned bits from the bottom of the pan. Add the tomato paste and minced chipotle and whisk into the pan sauce. Bring the sauce to a boil, reduce the heat, and simmer for a few minutes until the sauce has reduced and thickened slightly.  Add the diced onion and minced garlic on top of the seared beef in the slow cooker. Pour the pan sauce down over the onions, garlic, and beef. Cover and cook on low for 6-8 hours .

3.  Stir in the lime juice.  Remove the beef from the slow cooker and shred with two forks (if necessary – it may be so tender it will just fall apart). Use a slotted spoon to remove the onions from the slow cooker, and mix into the shredded beef.

4.  Serve the beef in the flour tortillas, topped with your favorite taco toppings. I like to top mine with fresh lettuce, tomato, onion, avocado, cilantro, and a squeeze of lime.


**This post and photos are property of http://dishingwithdish.blogspot.com/ **