Friday, November 30, 2012

Slow Cooker Peaches and Cream Steel-Cut Oatmeal

Peaches and Cream Oatmeal
Here is another recipe for slow-cooked steel cut oatmeal, from the same blog as the Pumpkin Spice recipe.  (And I've since made two more flavors!  I'll share those some other time.)  My husband and I love oatmeal but I don't have 20 minutes in the morning to make the steel-cut kind.  This is another recipe that I made during the day and stuck in the fridge.  Then in the mornings, just dish out however much you want and warm up in the microwave for 2-4 minutes.  Serve with dairy or almond milk.  Very delicious! 

PS:  (3/18/13) I've made this a few more time and took some much-needed new photos; this stuff is delicious! 
Peaches and Cream Oatmeal

Slow Cooker Peaches and Cream Steel-Cut Oatmeal
adapted from Eat at Home

1 cup steel cut oats
1 can (15 oz) sliced peaches in juice
enough milk to bring liquid to 4 cups (I used one can evaporated; the rest almond milk)
dash salt
cinnamon, optional
1.  Spray inside of crock with nonstick cooking spray.  Put steel cut oats in crock.
2.  Drain can of peaches, reserving juice.  Slice peaches in bite size pieces. Add to crock.  Add milk to peach juice to make 4 cups. Pour into crock.  Add dash of salt and cinnamon and stir to combine.
3.  Cook 3-5 hours on low.  (4 hours was perfect for me.)  Liquid should be mostly absorbed and the mixture should be creamy.  Taste to make sure the texture is good.  Serve with extra milk and brown sugar or maple syrup, if desired.
Peaches and Cream Oatmeal

**This post and photos are property of http://dishingwithdish.blogspot.com/ **

Wednesday, November 28, 2012

Feta Tomato Soup


I'm always up for trying a new homemade tomato soup recipe.  They are always good!!  We had this a long time ago; lol, I'm always backed up on recipes to blog about.  We probably had these with grilled cheese and Caesar Salad, if I know myself very well (and I think I doooo!)
 
This is one that's nice for winter because it uses canned tomatoes. Most people probably always have the ingredients on hand to make this.  It's good without the feta, too, if you don't have that.  A tip for feta: you can freeze it and just use it straight from the freezer.  The already-crumbled is most convenient and easiest to use right out of the freezer. 
 
To get that extra little bit of creaminess, I stirred 1/2 cup almond milk into this before serving.  I love using almond milk for soups; it makes them creamy with hardly any extra fat or calories.  :)
 
Feta Tomato Soup
adapted from Food
 
2 tablespoons extra virgin olive oil
2 garlic cloves, chopped small
1 medium onion, chopped small
2 tablespoons all-purpose flour
1 tablespoon tomato paste
2 cups chicken broth/stock or 2 cups vegetable broth/stock
1 (28 fluid ounce) canned diced tomatoes
1 tablespoon chopped fresh oregano or 1 teaspoon dried oregano
1 tablespoon chopped fresh basil or 1 teaspoon dried basil
1 pinch sugar
1/2 teaspoon salt
1/4 teaspoon black pepper
1/2 cup plain unsweetened almond milk, optional
1/2 cup crumbled feta cheese, for garnish
 
1.  In a large saucepan, heat olive oil over medium heat.  Add garlic and onion and saute until very tender, about 5 minutes.  Mix in flour and tomato paste; stir well and cook for 1 to 2 minutes, stirring slowly constantly.  Pour in stock and mix well.  Add tomatoes including liquid, oregano, basil and sugar and simmer for 12 to 15 minutes, stirring occasionally. 
 
2.  Puree the soup mixture in batches in a food processor or blender until smooth, then return to the saucepan.  Bring back to simmer.  Add optional almond milk.  Season with salt and pepper or to taste.  When serving, sprinkle some feta cheese on top as a garnish.
 

**This post and photos are property of http://dishingwithdish.blogspot.com/**/

Monday, November 26, 2012

Garlic Bread Seasoning


This is a good recipe to have on hand for making super quick garlic bread, or you can also use it in place of the topping on this focaccia bread- just use about 2 or so tablespoons.  I thought this topping was a little too salty when combined with salted butter when I used it for garlic bread, so just keep that in mind- either reduce the salt or use unsalted butter if that is a worry for you.  You just keep this in a airtight container in the freezer and take it out whenever you need it. 
Garlic Bread Seasoning
adapted from Our Best Bites
(salt is reduced from 2 tsp to 1tsp below)

1/2 cup powdered Parmesan cheese
1 tsp. Kosher salt
2 Tbsp. garlic powder
2 tsp. oregano
2 tsp. basil
2 tsp. marjoram
2 tsp. parsley
 
1.  Combine ingredients in a jar or airtight container and shake until combined. 
 
2.  To make garlic bread, spread softened butter on top of french bread sliced length-wise, and sprinkle 1 1/2 Tablespoons Garlic Bread Seasoning over.  Wrap in foil and bake @ 375 F until butter is melted.  Can also use as a focaccia bread topping, or for homemade bread sticks. 
 
**This post and photos are property of http://dishingwithdish.blogspot.com/**/

Saturday, November 24, 2012

Stovetop Cheesy Broccoli Rice with Ham


First of all, I hope everyone had a great Thanksgiving.  We had a large group here, and don't really have much in the way of leftovers besides a small amount of turkey, but if you are looking for ways to use up some turkey, this homemade Turkey Noodle Soup recipe is a popular search destination on my blog.  (I wouldn't feel like making homemade noodles so soon after Thanksgiving- just use store bought ones, lol!)  Also, this Turkey Lemon Orzo Soup is a good way to use up some turkey.  Or make some Taco Soup in the crockpot using leftover turkey. 

So on to this rice recipe- this one was just so, so good!!  I was expecting it to be good, or I wouldn't have made it, (lol!) but it was just so delicious.  And easy, and a one-pot meal, pretty much.  I did make some peas to go alongside it.  I first saw this over at Home Cooking with Sonya.  When the broccoli was steaming, I added a few splashes more of water to help it along.  I didn't have leftover ham to use in this, so I just bought a package of two ham steaks and chopped those up.  They yielded less than 3 cups; just over 2 cups, I think, but it was perfect that way.  More would have been fine, too. 
Stovetop Cheesy Broccoli Rice with Ham
adapted from Buns in My Oven

1 tablespoon olive oil
1 cup long-grain white rice
2 1/4 cups chicken broth
2 small heads of broccoli
2 tablespoons butter
2-3 cups cooked diced ham, hot (warm it up in the microwave for a couple of minutes)
1 cup shredded sharp cheddar (I used an extra 1/3 cup, about)
1/2 teaspoon garlic powder
salt and pepper, to taste
splash of milk, as needed
1.  Heat the olive oil in a medium sauce pan over medium heat.  Add the rice and stir to coat. Toast the rice, stirring often, just until it starts to turn golden.  Pour in the chicken broth, bring to a boil, turn heat to low, and cover.  Cook, covered, for 10 minutes.
2.  While the rice is cooking, chop the broccoli into small, bite-sized pieces.  After 10 minutes, add the broccoli to the rice and continue cooking for 5 -10 minutes or until most of the liquid has been absorbed. (The broccoli will cook for 5-10 minutes and steam for 5. If you'd like it more tender, add it to the pot of rice sooner. As it is, it should be tender-crisp.  If no liquid remains in pot to steam broccoli, add splashes of water or broth as needed.)
3.  Remove from the heat and add the butter, ham, cheddar, and garlic powder. Stir until well incorporated. Cover and let sit for 5 minutes. 
4.  Stir again and add salt and pepper to taste and a splash of milk if you'd like to thin out the texture a little bit, if needed.
**This post and photos are property of http://dishingwithdish.blogspot.com/ **

Thursday, November 22, 2012

Sweet Potato Pie


Happy Thanksgiving!!  I had sweet potato pie for the first time (I know!) at a friend's house a few months ago, and fell in love with it. Ever since then, I've been wanting to try making it on my own. I wanted to use cardamom in it, and ginger, because I think those flavors go very well with sweet potatoes. We went to another friend's Pie Party last night so I made this to bring. I only got to taste a little bit of it, but I really liked it. 
I used Joy the Baker's recipe, since I really like everything she makes, and she really likes this pie.  It was fun to do, and it turned out very well.  She mentions there will be too much filling for a 9-inch pan, which is what I used,  so I had some mini graham-cracker shells ready (store bought).  It worked out perfectly- I filled 4 of those tiny shells with the leftover filling.

Sweet Potato Pie
adapted from Joy the Baker

2 cups mashed cooked sweet potatoes
3/4 cup packed brown sugar
1/2 cup granulated sugar
1 1/4 teaspoon ground cardamom
1/2 teaspoon freshly grated nutmeg
1/2 teaspoon dried ginger
1/2 teaspoon cinnamon
1/8 teaspoon salt
1/4 cup (1/2 stick) butter, melted
2- 5oz cans evaporated milk (1 1/4 cups evaporated milk)
3 large eggs
1 Tablespoon vanilla
9 or 10-inch pie crust

1.  Boil two medium sweet potatoes in their jackets in a covered pot over moderate flame, until sweet potatoes are very soft and tender.  Test with a thin sharp knife. If there is any resistence, boil longer. Knife should penetrate the sweet potatoes fast and smoothly. Remove potatoes from the water and allow to cool on a plate or wire rack. 

2.  When cool enough to handle, peel potatoes, cut into chunks and place in a large bowl. Mash potatoes thoroughly with a potato masher. There should be NO lumps.

3.  Measure 2 cups and put in a medium sized pot with the packed brown sugar, all of the spices, salt, the 1/2 stick butter, and one 5 oz can of evaporated milk. Cook on low flame for about 5 minutes, whipping with a wire whisk until butter and brown sugar are melted down and mixture is well blended, smooth and starts to bubble. Remove from fire and let cool in pot.

4.  In a medium sized bowl, beat the three eggs with a fork. Add the second 5oz can of evaporated milk, granulated sugar and vanilla to the eggs and continue beating until creamy. Pour the cooled sweet potato mixture from pot into a large bowl. Stir in the egg mixture. Blend thoroughly with a whisk and refrigerate mixture overnight or use immediately.

5.  When ready to bake, place the prepared crust in the freezer while you preheat the oven.
6.  When the oven is preheating, remove the crust from the freezer and add the sweet potato filling until almost full. I used a 9-inch pie shell and had a bit of extra filling (can use extra to fill tart or mini graham shells).
7.  Heat oven 450 degrees with a cookie sheet inside. After heated, pour filling into the pie shell and put on the HOT cookie sheet. Bake at 450 for ten minutes then turn oven to 325 (or 300 with the convection fan turned on) and bake for 1 hour more, or until edges and center are raised and puffed and the center only shakes slightly.  Remove from oven. Let cool on a wire rack for 1 hour before serving.
**This post and photos are property of http://dishingwithdish.blogspot.com/ **

Wednesday, November 21, 2012

Acorn Treats


Here's a fun, festive Thanksgiving decoration that's easy to make.  The kids helped us make these last night- all you need is Nutter Butter mini's, regular-sized Hershey's kisses, mini chocolate chips, and a "glue".  We used Nutella, but one can use peanut butter or frosting, as well.  You only need a tiny bit. 

I first saw these in one of my Hello, Cupcake books, using Mini Nilla Wafers.  We tried those too, but liked the look of the Mini Nutter Butters better.  Also, we split each sandwich cookie in half, so it wasn't such a thick layer.  I like them a lot better this way.  The pic below shows both the Nilla Wafer and Nutter Butter way.

Acorn Treats
adapted from Our Best Bites

Hershey's Kisses
Nutter Butter Bites or Mini Nilla Wafers
Mini Chocolate Chips
Nutella, PB, or frosting

1.  Unwrap Hershey's kisses.  If using Nilla Wafers, split each in half where the filling is.  If necessary, use some Nutella, PB or frosting as "glue" to hold the kiss in place.  Place the flat side of the kiss onto the flat side of the cookie.  On the opposite side, "glue" a mini chocolate chip onto the cookie using nutella, PB or frosting.  To make this easier, place a small dollop of nutella, pb or frosting onto a small plate.  Lightly "dip" each chocolate chip into it, then stick that on the "acorn".


**This post and photos are property of http://dishingwithdish.blogspot.com/ **

Tuesday, November 20, 2012

Dinner Rolls

This recipe comes from the little recipe book I got in Maine this summer called "A Taste of Maine Recipe Book".  There are some good-looking recipes in there; mostly old-fashioned and comforting-looking dishes, and of course, lobster, crab, maple syrup, and blueberry recipes are featured.  I want to try the Maple Nut Fudge for Christmas!

This dinner roll recipe looked good and simple, using ingredients like butter and milk for great texture and flavor.  They are supposed to be white rolls, but I used one cup of whole wheat flour.  If you are looking for a Thanksgiving roll recipe, give these a try.  :)


Dinner Rolls
from A Taste of Maine Recipe Book

4 cups flour (use one cup whole wheat for wheat rolls)
1 package (2 1/4 tsp) active dry yeast
1/3 cup sugar
1 teaspoon salt
1 cup milk
1/2 cup butter
3 large egg yolks

1.  Using a stand mixer, whisk together the flour, yeast, sugar, and salt.  In a small saucepan, heat the milk and butter, stirring until the butter melts and the liquid is very warm (about 120 F).  Pour the warm milk mixture, along with the egg yolks, into the flour mixture.  Using a dough hook, mix until all is well-blended.  Knead by hand or in the bowl for several minutes, adding more flour if dough is still sticky. 

2.  Lightly grease the sides of a large bowl, place dough in bowl, and cover with plastic wrap or towel.  Let rise in a warm spot until doubled in size (1 hour). 

3.  Lightly grease a 9x13 baking pan.  Turn dough out onto a floured surface.  Divide dough into 16 equal pieces.  Form into smooth balls and place in pan with any seams on the bottom. 

4.  Let rise again until almost doubled in size, 30-45 minutes.  Preheat oven to 350 F, and bake rolls for 15-25 minutes or until golden brown and cooked through. 

**This post and photos are property of http://dishingwithdish.blogspot.com/ **

Monday, November 19, 2012

Apple Crisp

I made this Apple Crisp to go with the Maple Gelato last week.   This is from that same blog, too.  What a lovely combination!!  Especially when the gelato melted into the warm apple crisp.  I highly recommend this.  :)  Maybe even for Thanksgiving!  I'm not an Apple Pie person; but I love me some apple crisp with ice cream. 
The apple crisp pictured is an individual serving I made from part of one apple and some of the crumble topping I had set aside.  When I made a whole pan of this for company, every last bit was eaten, so I had to bake this little guy the next day for photography purposes.  :)  And eating purposes. 

This apple crisp had pecans in the recipe, but I subbed oats for them because 1) we were having company and so many people don't like nuts (or are allergic), and 2) I love oats in fruit crisps and really wanted some in there.  I cut the recipe in half, but I shouldn't have- I'll include the full recipe below.  :)
Apple Crisp
adapted from Ezra Pound Cake

Filling:
3 pounds tart apples
1 tablespoon plus 1 teaspoon lemon juice
1 cup sugar
1 teaspoon ground cinnamon
1/2 teaspoon ground cloves

Topping:
1 cup (2 sticks) unsalted butter
2 1/4 cup all-purpose flour
1 1/2 cups sugar
1/4 teaspoon salt
1 cup chopped pecans OR old-fashioned oats
ice cream, for serving

1.  Preheat oven to 400 degrees F.
2.  Peel, core, and slice the apples into 1/4-inch wedges, and place them in an ungreased 9x13 inch pan.  Toss apple slices with the lemon juice.  (To slice apples- I used my apple slicer kitchen tool; then cut each slice in half length-wise so they were thin enough.)  In a small bowl, combine the sugar and spices, and sprinkle over the apples. 
3.  In a separate bowl, cut the butter into the flour until the mixture is coarsely blended (I used a pastry blender). Mix in the sugar, salt, and pecans or oats. (The mixture should be crumbly.)  Place the topping on top of the apple mixture, and bake for 45 minutes or until the top is browned and the liquid in the apples is dark. Serve warm with ice cream.

**This post and photos are property of http://dishingwithdish.blogspot.com/ **

Friday, November 16, 2012

Maple Gelato


We recently had company for dinner and I had an excuse to make this delicious ice cream that I've had my eye on for a few weeks.  The base whips up very quickly- you just use pure maple syrup in place of any sugar.  Since this is a gelato, it contains mostly whole milk and very little cream.  It also contains egg yolks for richness. 
You are supposed to use the darker Grade B Maple Syrup, since that flavor is more intense, but I can only purchase Grade A here.  With Grade B, my gelato would have been darker with a more intense maple flavor, but I loved it just the way it was. 
We served this with a delicious Apple Crisp off the same food blog (ezrapoundcake.com)  What a delicious combination!  I'll share the crisp recipe sometime soon.  This would be a delicious ice cream to make for Thanksgiving and serve with apple or pumpkin pie, or an apple crisp like we had.  Our guests were raving over dessert!  :)

Note:  It's so important to always, always strain cooked ice cream mixtures like this before chilling.  I thought I had done a great job of not letting the eggs cook at all while this was on the stove, but when I went to strain it, there was a thin layer or cooked egg mixture on the bottom of my pan.  No problem, because I was straining it anyway.  If I hadn't, the finished ice cream product would be full of little bits of sweet scrambled egg- gross! 

Maple Gelato
adapted from Ezra Pound Cake

1 cup maple syrup, Grade B or darkest available (Grade A works too)
4 egg yolks
2 1/2 cups whole milk
1/4 tsp salt
1/2 cup heavy whipping cream
1.  In a large bowl, combine the syrup and egg yolks. Beat together until it gets noticeably lighter in color, then set aside.  (I used my KitchenAid with paddle attachment.)
2.  Combine the milk and salt in a 3 quart pot over medium heat. Bring to a boil, then take off the heat.  Slowly pour 1/2 cup of the hot milk into the syrup mixture, whisking constantly. Pour the milk/syrup mixture back into the pot with rest of the milk, and add the cream.

3.  Cook over low heat, stirring constantly, until the mixture coats the back of a spoon. Take the thickened mixture off the heat, and pour through a mesh sieve into a bowl or tupperware. Let cool 20 minutes, then cover and refrigerate until cold (overnight is good). 

4.  Freeze in your ice cream maker according to manufacturer's directions.  For firm ice cream, transfer to a freezer container and freeze for about 6 hours or until firm.
**This post and photos are property of http://dishingwithdish.blogspot.com/ **

Wednesday, November 14, 2012

Filipino Lumpia

I'm finally putting up a recipe for Lumpia!  (Lumpia is a delicious Filipino food, similar to fried egg rolls.)  I've made it three times in the past two years, and have wanted to post a recipe for it, but have never been able to take pics of the process until now.  I didn't even get as many good pics of it as I wanted, but this will have to do for now.  :) 

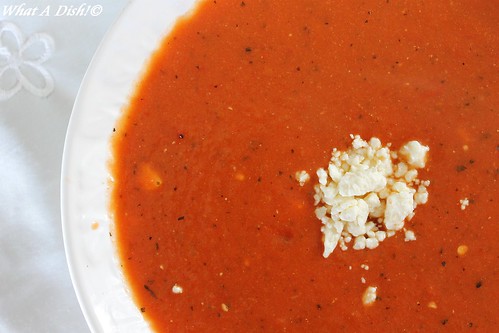
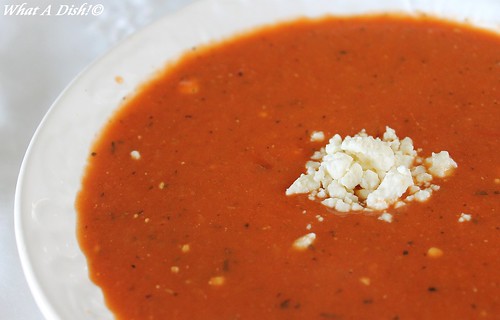
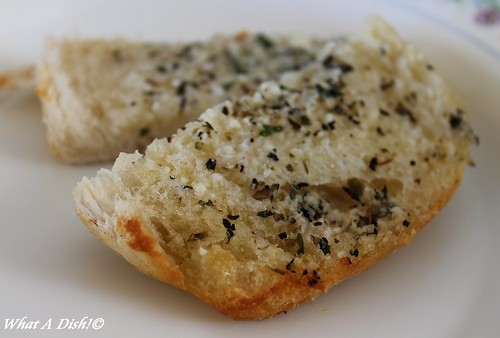
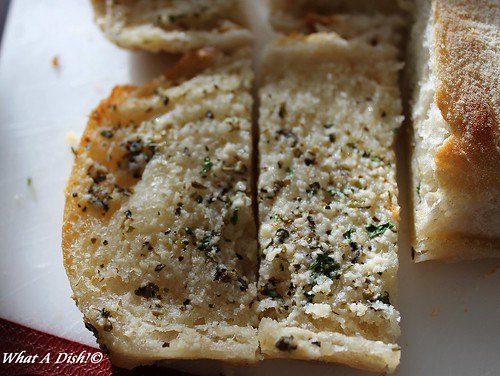
On Halloween, two friends came over and we had a lumpia-making party.  It was so fun, and then we ate lumpia for lunch along with Japanese fried rice, eggplant and ground pork, this ice cream, and brownies.  I was stuffed!  Everything was so good. 
I grew up eating lumpia at friend's houses and school and church parties.  My mom learned how to make it while we were all living in the Philippines and I've made it with her at least once.  The version I'm sharing here is a raw-meat version, meaning you don't cook the meat mixture before filling the wrappers and frying.  You must fry these well enough to fully cook the meat inside.  Other versions call for cooking the meat first, and those are good too- this version is just easier for me. 

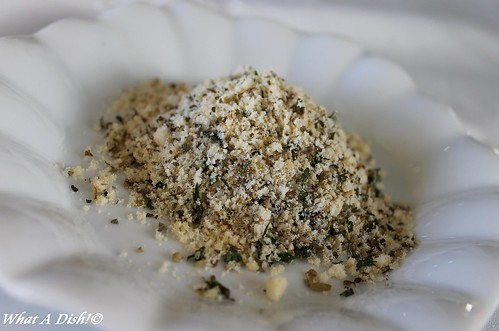
For this version, first, we chopped up our veggies using my food processor.  Then we added half of the meat (cuz my processor wasn't big enough for all of it) and ran the machine until it was a smooth mixture.  Then we added the rest of the meat by hand (or by spoon) in a large bowl.  Then came rolling the mixture in the lumpia wrappers and frying.  A trick I learned from my friend (who taught us this recipe) is to place the meat mixture in the empty lumpia-wrapper bag, snip a corner off, and pipe the meat cleanly onto the wrapper that way. 

When wrapping these, you can use either a square or circle lumpia wrapper.  If using a square, pipe a line of meat (lol) close to the corner of the wrapper facing you.  Start rolling, and after a few rolls, fold the sides in.  This is really hard to explain unless you see someone doing it.  I took some pictures of my friend rolling one, but she is using a round wrapper.  Just roll a square one the same way as this.  The lumpia wrapper package usually has a diagram on the back on how to roll.  Have a small bowl of water nearby.  Use a bit to wet the lumpia wrapper and seal it. 

Those are my friend's hands below- she's the lumpia expert and a much better "roller" than I was.  Ha ha!
Lumpia
from my friend H.S.
makes around 60, more or less

2 to 2 1/2 boxes* lumpia wrappers (around 30 in each pkg)
1 1-lb pkg of EACH ground pork and ground beef
1-2 stalks celery
2-3 cloves of garlic
1-2 carrots
1-2 tbs soy sauce
1 egg
1-2 tbs flour
salt and pepper
oil for frying

1.  In a food processor, combine the celery, garlic, and carrots.  Process until chopped very, very fine.  Don't be afraid of pureeing them; you want them almost to that stage.  When chopped enough, add one pound of meat and process that until the mixture is smooth and combined.  If your food processor is big enough, you can add both pounds of meat and process.  If not, remove the mixture to a bowl and add in the other pound of meat with your hands or a wooden spoon.  Now, mix in the soy sauce, 1 egg, the flour, and pepper.  We did not use any salt, but you can if you want.  (We also used reduced-sodium soy sauce and the saltiness level was just fine.)

2.  If lumpia wrappers are stuck together, separate them and cover with a damp paper towel as you work.  Have ready a large cutting board and a large 9x13 pan or something to hold the wrapped lumpia.  Using the empty lumpia bag or a disposable piping bag, fill it with the meat mixture and snip off a corner.

3.  Now, roll all the lumpia.  Pipe a line of filling close to the corner of the wrapper, or kind of close to the edge if wrappers are round.  Take the corner (or side) nearest to the filling and fold it over the filling. Keep rolling and when you reach around the middle, tuck in both sides. (See photos above.) Continue to wrap, but be sure to roll very tight to keep everything in. When you reach the end, use a little water to seal the edge. 

4.  At this point, you can freeze them in a single layer in freezer bags or fry them right away to eat.

5.  To fry them:  In a skillet, use about 1/2 inch to 1 inch of oil.  Heat over medium heat until oil is hot.  Fry the lumpia, a few at a time, not crowding the skillet, until browned and the meat is cooked inside.  To check this, use a meat thermometer or break one open to see if the pink is gone.  Drain on paper towels.

Note: To fry frozen lumpia, thaw completely first, and then fry as stated above. 

*If you have leftover lumpia wrappers, fill them with sliced bananas and mini chocolate chips and fry.  These are SO good!!  You can also fill with leftover fried rice, Asian noodles, etc, and fry. 

*If you have leftover meat, but no wrappers, use the meat as a base of delicious fried rice!  I did this last night; used a tiny bit of oil; cooked the meat with diced bell peppers & onions, then added cooked rice and scrambled an egg in it. Then, add oyster sauce to taste- so good, esp. with the oyster sauce!
**This post and photos are property of http://dishingwithdish.blogspot.com/ **

Monday, November 12, 2012

Almond Poppy Seed Pancakes with Almond Syrup

I just love these pancakes.  I've made them three times in the past month or so.  The almond syrup is good too, and it really makes these taste like this delish glazed almond poppy seed bread.  This is just a wonderful combination. 

I used Joy the Baker's recipe for lemon-poppy seed pancakes, omitting the lemon and adding almond extract.  I used Cooking Classy's recipe for almond syrup.  Cooking Classy also has a recipe for pancakes on that post, but Joy the Baker's looked a little more simple and I've had great success with her pancake recipes in the past.  Plus, I'm a sucker for any pancake recipe calling for 2 cups of buttermilk, since I buy it in 1-cup containers here.  Easier and no waste that way.  :)
The almond syrup is made with buttermilk.  Instead of the cream called for, I used almond milk.  I've made a buttermilk caramel syrup in the past, and that is kind of similar to this.  The kids didn't want to try this; they are real maple syrup purists when it comes to topping pancakes, and prefer only that.  I'm glad they like the good stuff, but wish they'd try other toppings once in a while! 

Almond Poppy Seed Pancakes with Almond Syrup
adapted from Joy the Baker & Cooking Classy

Pancakes:
2 tablespoons granulated sugar
2 cups all-purpose flour
2 teaspoons baking powder
1 teaspoon baking soda
1 teaspoon salt
2 cups buttermilk
2 large eggs
1 teaspoon pure vanilla extract
1 teaspoon almond extract
4 tablespoons unsalted butter, melted
2 tablespoons poppy seeds
butter, shortening, or vegetable oil for frying
Almond Syrup, recipe below

1.  In a large bowl, whisk together flour, baking powder, baking soda, and salt. Stir in the sugar. Set aside.

2.  In a separate bowl, whisk together buttermilk, eggs, vanilla extract, almond extract, and melted butter. Pour the wet ingredients all at once into the dry ingredients. Add the poppy seeds and stir to combine. If a few lumps remain, that’s ok. Let the batter rest for 10 minutes while the griddle heats.

3.  Place a griddle, or a nonstick saute pan over medium heat. Add a bit of butter, shortening, or vegetable oil to the pan. A teaspoon of fat will do for a nonstick saute pan, a bit more fat may be necessary for a griddle.   Dollop batter onto hot pan.  I use about 1/4 cup of batter. Cook until golden brown on the bottom and and bubbling on top. Flip once and cook until golden brown on each side.  Serve with almond syrup.

Almond Syrup:
1/4 cup salted butter
3/4 cup granulated sugar
1/2 cup almond milk
1/4 cup buttermilk
1/2 teaspoon baking soda
1 tsp almond extract

1.  Melt butter in a medium saucepan over medium heat.  Whisk in sugar, almond milk and buttermilk.  Cook mixture, stirring frequently, until mixture begins to boil and sugar has dissolved.  Remove from heat and stir in baking soda and almond extract.  Whisk for about 10 seconds until mixture becomes foamy.  Serve warm.  Syrup can be stored in the fridge up to one week and reheated before serving, or serve cold.
**This post and photos are property of http://dishingwithdish.blogspot.com**

Friday, November 9, 2012

Two Ingredient Dulce de Leche Ice Cream (No Ice Cream Maker Required!)

This recipe is just so good, so fun, and so easy.  It's just amazing!!  You just whip up some heavy cream, add a can of Dulce de Leche, and put it in the freezer!  You don't even use an ice cream maker for this- it's amazing.  Well, it is!  I know I said how amazing it was just a few sentences ago.  (For local readers, look for Doce de Leite by Nestle in brown-labeled cans like shown here.  It says "Cozido" in big letters and "Doce de Leite" in small letters.)
I've made this twice since discovering the recipe on Buns in my Oven.  I want to try more variations on this idea- maybe Nutella or Peanut Butter instead of Dulce de Leche.  This is such a fun idea!
Two Ingredient Dulce de Leche Ice Cream
from Buns in my Oven

1 pint (2 cups) heavy whipping cream
1 14 oz. can Dulce de Leche (or make your own)
1/2 teaspoon flaky sea salt

1.  With a stand mixer or hand mixer, whip the cream until you have soft peaks.  With the mixer still on, drop globs of dulce de leche into the bowl until it is all incorporated.  I did a few strokes by hand with a rubber spatula at the end. 

2.  Pour into a freezer-safe container & freeze for 6 hours or longer, if desired.  Serve sprinkled with a bit of optional sea salt.
**This post and photos are property of http://dishingwithdish.blogspot.com/ **

Wednesday, November 7, 2012

Sweet Moist Cornbread

This is a delicious cornbread.  I got the recipe from a cooking friend; she made it for us at her house and it was divine!!  Almost good enough for dessert.  :)  I took this to a Halloween/Chili party a few weeks ago and ate the leftovers for breakfast after.  It is very good warmed just slightly in the microwave with a little butter.  Some of the ingredients are a little unusual for cornbread, but they make it taste phenomenal. 

Sweet Moist Cornbread
adapted from Epicurious and this friend

1 cup all-purpose flour
1 cup cornmeal
2 tablespoons baking powder
1 teaspoon salt
3/4 cup (1 1/2 sticks) unsalted butter, at room temperature
3/4 cup sugar
4 large eggs
1 1/2 cups canned cream corn (one regular can)
1/2 cup canned crushed pineapple, drained
1 cup shredded Monterey Jack or mild white Cheddar cheese

1. Preheat your oven to 325 F.  Butter and flour a 9-inch square glass cake pan.

2. In a mixer, cream the butter and the sugar. While the mixer is running, add the eggs one at a time, beating well after each addition. Add the corn, pineapple and cheese, beating well after each addition.  On low speed, add the dry ingredients, and mix until blended well.

4. Pour the batter into the prepared pan and bake until a tester stuck in the center comes out clean, about one hour to an hour and fifteen minutes. Do not undercook the cornbread. It should be golden brown on top when done.

**This post and photos are property of http://dishingwithdish.blogspot.com/ **

Monday, November 5, 2012

El Salvadorian Pupusas de Queso con Curtido

A few years ago, my husband and I were talking about the foods he ate in New York City while he lived there as a missionary for our church.  He started describing Pupusas and I have never heard of anything like them before.  We had this conversation about 5-6 years ago, and I tried looking up recipes online back then, but didn't find much at all.  Well, a few weeks ago, I spotted this recipe, through Tastespotting.com, I believe.  I was so excited!  Then I Googled pupusas and there are a lot more recipes out there now!  Thank goodness for the internet and food blogs.  :) 
I was eager to try this recipe because it was so straight-forward and simple.  The pictures of the process made it easy to understand, as well.  I'm happy to say these turned out really well!  I served this with Curtido (cabbage slaw) and I wasn't crazy about the curtido.  I would just not make it next time, but serve the pupusas with some veggies or salad.  Also, my husband was remembering as we were eating- he said he remembered eating these with some beans and some kind of meat.  So beans, at least, will be on the menu for next time! 

Note: I'm putting this in the "Tacos" category, even though I know  they're not!  Just kinda similar.  :)

Pupusas de Queso con Curtido
adapted from Simply Life

Pupusas:
2 cups masa harina (found in the flour or ethnic section of store)
Pinch of salt
1 1/3 cup warm water
1 cup grated Monterey Jack cheese (or other preferred cheese)
1-2 tbs. oil, plus more for keeping hands oiled
 
Curtido:
1/2 head cabbage, shredded
1 large carrot, grated (use a vegetable peeler)
1 bell pepper, sliced
1/2 cup apple cider vinegar
1/4 cup water
1/2 tsp. salt
1/2 tsp. brown sugar
1 tsp. dried oregano
Pinch red pepper flakes
 
For the Pupusas:
1. Mix together masa harina, salt and water. Knead to form a smooth, moist dough (if the mixture is too dry, add a touch more water; if the mixture is too sticky, add a touch more masa harina). Cover the bowl with a cloth and let stand for 10 minutes.
 
2. With lightly oiled hands, form the dough into 8 balls that are about 2 inches in diameter. Using your thumb, make an indentation into one of the balls, forming a small hole. Fill the hole with 1 tablespoon of cheese and wrap the dough around the filling to seal it. Pat the dough back and forth between your hands to form a round, flattened disk about 1/4-inch thick. Repeat with the remaining balls, making sure to keep your hands lightly oiled throughout the entire process.
 
3. Heat 1 tbs. oil in skillet over medium-high. Cook the pupusas for about 3 minutes per side until golden brown, adding additional oil to skillet if needed. Serve warm with curtido (recipe below) on the side, or beans, and enjoy!
 
For the Curtido:
1. Combine the cabbage, carrot, and pepper in a bowl. Combine the remaining ingredients in a separate bowl and then pour over the cabbage mixture and toss together. Refrigerate for at least 30 minutes, serve and enjoy!

**This post and photos are property of http://dishingwithdish.blogspot.com/ **

Saturday, November 3, 2012

Peanut Butter Cream Cheese Pie, Version Two

I first made this pie back in 2010.  I followed the original recipe then, using Cool Whip.  My daughter was begging me to make this again, but I did not want to use the dreaded Cool Whip this time.  Instead, I just made homemade whipped cream and stabilized it with some gelatin.  I'm not sure if this is necessary or not; I kind of want to try it again and not do this step, because it was extra work and I didn't do it quickly enough; there were some unfortunate chunks of gelatin in this.  Lol! 

This time, I made a homemade Oreo crust like the recipe suggests and didn't use a store bought crumb crust.  The Oreo crust is SO much better!!  It makes too much mixture for just the crust though, so we ate the rest of it sprinkled over the top of the pie. 
Now for the scary truth- this pie is very good this way, with the real whipped cream, and my fam loved it (minus the gelatin chunks), but I actually prefer the texture and lightness of using the Cool Whip!  (How embarrasing).  It was just lighter and fluffier and air-ier with the Cool Whip!  Gosh darn it all.  Original recipe can be found here.  You decide!

Peanut Butter Cream Cheese Pie II
adapted from Real Mom Kitchen via Myself

Crust:
25 Oreos
4 tablespoons butter, melted

1.  Crush the Oreos until they’re fine crumbs (food processor is good). Pour melted butter over the top and stir with a fork to combine. Press into pie pan and bake at 350 degrees for 5 to 7 minutes, or until set. Remove from oven and allow to cool completely.  (You may have some mixture leftover; made too much for my pie pan.)

Filling:
1 cup creamy peanut butter
1 (8-ounce) package softened cream cheese
1 1/4 cups powdered sugar

For stabilized whipped cream:
1 teaspoon unflavored gelatin
4 teaspoons cold water
2/3 or 1 cup heavy whipping cream
1/4 cup powdered sugar

1.  Make the stablized whipped cream:  In a small pan, combine gelatin and cold water; let stand until thick.  Place over low heat, stirring constantly, just until the gelatin dissolves.  Remove from heat; cool just slightly- a few minutes (do NOT allow it to set).  Whip the cream with the icing sugar, until slightly thick.  While slowly beating, add the gelatin to whipping cream.  Whip at high speed until stiff.

2.  Add the peanut butter and cream cheese- beat until smooth, but not too long; you do not want to deflate the whipped cream. Add powdered sugar and beat until smooth, scraping the sides as needed.

3.  Pour filling into crust, evening out the top with a knife or spatula. Chill for at least an hour before serving. (It’s better the longer it sits in the fridge- mine was in there 4-5 hours). Drizzle with chocolate syrup.
**This post and photos are property of http://dishingwithdish.blogspot.com/ **

Thursday, November 1, 2012

Pizza Monkey Bread + Easy Marinara Sauce

A friend pinned this on Pinterest a while ago and I saved it, knowing a time would come when I would make it, and make it, I did.  :D  It combines two great thing... well, 3 great things.  Monkey Bread, Pizza Bites, and just plain ol' pizza!  They were fun to make.  These were not as big of a hit with the kids as I would have thought, but you can never really know what's going on in those minds.  Crazy kids. 
For this recipe, pizza ingredients (pepperoni, mozzarella cheese) are wrapped up in individual dough balls and baked.  Then you dip each little ball in marinara as you are eating. 

Pizza Monkey Bread
adapted from Confessions of a Foodie Bride

2 cloves garlic, thinly sliced
4 Tbsp butter
2 lbs pizza dough, recipe below
6 oz mozzarella cheese, cut into small cubes (you'll need ~48 pieces)
48 slices of Turkey pepperoni (from 1 package)
2-3 cups marinara sauce, warmed, for serving (recipe below)
 
1.  Heat garlic and butter over medium heat just until the garlic begins to brown. Remove from heat and let sit.

2.  Lightly brush the inside of a bundt pan with the garlic butter.  Pull off large marble-sized balls of dough and flatten (about 2/3 of an ounce, a kitchen scale makes this very easy). Top with a slice of pepperoni and a cube of mozzarella.  Wrap the dough around the pepperoni and cheese, pinching well to seal.

3.  Very lightly brush the pizza ball with garlic butter and place into the bundt pan (dab the pizza balls on a butter-dipped silicon brush to keep butter use low - there will be 1+ Tbsp leftover - and your hands butter free. Buttery hands make it hard to get the pizza balls to seal).  Repeat until all of the dough is used.  Drizzle any leftover butter over rolls in pan. 

4.  Cover and let sit for 30 minutes, while preheating the oven to 400.  Bake for 35 minutes, until the top is very brown.  Remove from the oven and let sit for 10 minutes.  Turn out onto a platter and serve with warmed marinara sauce for dipping.

Pizza Dough
adapted from Foodie Bride

1 3/4 cup warm water, divided
1 tsp sugar
1 envelope (2 1/4 tsp) instant yeast
2 Tbsp extra-virgin olive oil
4 cups (22 oz) bread flour, plus more for dusting
1 1/2 tsp salt

1.  Put 1/2 cup warm water into the bowl of your stand mixer and stir in sugar until dissolved. Sprinkle the yeast over the top and let stand until frothy, about 5 minutes. Add the remaining water and oil.

2.  Add the flour and salt to the stand mixer bowl fitted with the dough hook. Mix on low until the flour is combined and then turn up the speed and knead until the dough is smooth and elastic, about 5 minutes. Transfer the dough to an oiled bowl (I remove the dough, oil the stand mixer bowl, and put the dough back in… one less dirty dish). Cover with plastic wrap until it doubles in volume, about 1½ to 2 hours.  Proceed with Pizza Monkey Bread recipe as above. 

Easy Marinara Sauce
adapted from Recipe Girl

1/2  tablespoon olive oil
4 garlic cloves, thinly sliced
4 fresh basil leaves, torn into small pieces
One 28-ounce cans crushed tomatoes, with their juices
Kosher salt, to taste
1 teaspoons balsamic vinegar

1. In a large saucepan or deep skillet, warm the olive oil at low heat. Add the garlic and cook until golden, about 3 minutes. Stir in the basil.

2. Pour in the tomatoes with their juices, bring the sauce to a boil, and then add the Kosher salt. Reduce the heat to low and simmer 45 to 50 minutes. As the sauce thickens toward the end, stir in the balsamic vinegar. Remove the pan from heat.  Can be frozen.