Monday, September 30, 2013

Thai Yellow Curry (And Homemade Curry Paste)

yellow1W
This was a delicious and flavorful dish.  If you use store-bought curry paste, this dish is incredibly easy to make, too.   I could have ordered yellow curry paste from Amazon, but I chose to make my own, instead.  I froze what I didn't use in 2-3 tablespoon mounds to use for later.
yellow3W
As far as the kids go, my two-year old loved this.  This curry is more sweet than spicy-hot, so it was perfect for him.  My 11-year old daughter seemed to like this well enough; had seconds, but didn't finish them.  My boys seemed scared of it...... oh well.  It's not like food from different countries is foreign to them!!  :)  

A note about using the homemade curry paste: unlike store-bought paste, the homemade version has no added salt, so you may need to add some salt to the finished dish.  If you use the shrimp paste or anchovies, those add some salt.  I didn't add salt, since the fish sauce called for in the yellow curry recipe contained enough salt for me.  

Thai Yellow Curry
adapted from Rachel Cooks Thai

1 14-ounce can of coconut milk
2 tablespoons yellow curry paste (recipe below, or use storebought)
1 large chicken breast
1 cup water
2 medium potatoes
1/2 of a large onion
1 14-ounce can of baby corn (or other vegetable)
1 teaspoon fish sauce*
1/2 teaspoon sugar or palm sugar
kaffir lime leaves, fresh basil, and/or thinly sliced hot red peppers, for garnish

1.  Prepare your ingredients. Slice the onion, baby corn, and chicken into bite-sized pieces. Peel, cut, and parboil the potatoes for 5 minutes. Set aside.

2.  Open the can of coconut milk and scoop the top thicker cream part into a pan. Heat this cream over medium heat until the oil just starts to separate from the milk. Then add the yellow curry paste and saute with the cream until it becomes fragrant. (If your coconut milk doesn't have cream on top... just dump the whole thing in and start with that.)

3.  Add the chicken, coat in the curry paste, and cook until it's done. Then add the rest of the coconut milk and 1/2 cup to one cup of water and bring to a boil. Let cook until the consistency of the curry is what you prefer. You can use more or less water depending on how thick you want your sauce.  

4.  Add the potatoes, onions, and baby corn and cook until just done, but still firm. Adjust seasonings with fish sauce *(for gluten-free cooking, make sure your fish sauce is gluten-free) and sugar to taste.  Garnish with thinly sliced kaffir lime leaves (or fresh basil)  and sliced red peppers. Serve with jasmine rice.

Homemade Yellow Curry Paste
adapted from Food

7 dried hot red chilies (long ones of the cayenne variety)
3-5 ounces shallots, chopped 
1 tablespoon fresh lemongrass, that has been thinly sliced cross ways
10 garlic cloves, peeled and chopped (10 if small or 5 if large)
1 inch piece fresh ginger, peeled and chopped 
1/2 teaspoon ground white pepper 
1 teaspoon curry powder
1/2 teaspoon ground cumin
1 teaspoon ground coriander
1/2 teaspoon ground cinnamon
1/2 teaspoon shrimp paste, chopped or 3 anchovies (or 1 tsp. capers + squirt fish sauce)
1/2 teaspoon ground turmeric

1.  Soak the red chillies in 5 tablespoons hot water for 1-2 hours. (You could also put them in a microwave oven for 2-3 minutes and then let them sit for 20-30 minutes.)

2.  Put the chillies, together with their soaking liquid, into a blender or food processor along with all the remaining ingredients in the order listed.  
Blend, pushing down with a rubber spatula as many times as necessary, until you have a smooth paste.

3.  What you do not use immediately should be refrigerated or frozen.  To freeze, lay a sheet of wax paper out on a baking sheet.  Measure out two or three tablespoon mounds onto the wax paper. Freeze overnight.  In the morning, place frozen mounds into a freezer-safe bag or container, label, and store in freezer.  When ready to use, thaw out desired amount in the refrigerator overnight, covered.  
yellow2W
**This post and photos are property of http://dishingwithdish.blogspot.com/ **

Thursday, September 26, 2013

Ricotta Seashell Pasta with Tomatoes

pasta5W
This is a dish I made often back in 2008 and 2009, but I had kind of forgotten about it.  I made up the recipe myself and back then, all the kids loved this.  They'd just pick out the tomatoes if needed.  I made it again recently, and I loved it, but the kids were weird about it, even though I served tomatoes on the side!  Anyway, this recipe deserves to be re-posted with better photos.  It's quick and easy and done in the time it takes to boil pasta.
pasta4W
Ricotta Seashell Pasta with Tomatoes

9 ounces small seashell pasta
15 ounces (about) ricotta cheese, regular or reduced fat
1/4 cup extra virgin olive oil
1/3 cup parmesan cheese
1-2 garlic cloves, minced
juice of 1/2 lemon
fresh pepper, to taste
sea salt, to taste
herbs, such as fresh parsley or basil, or dried Italian seasoning, to taste
2-3 medium tomatoes, chopped, or 6-8 large cherry tomatoes, quartered

1.  Boil a large pot of water and cook pasta according to package directions; drain. Meanwhile, in a medium serving bowl, mix ricotta, olive oil, parmesan, garlic, lemon juice, salt, pepper, and herbs until well combined. When pasta is done cooking, drain, and quickly add to ricotta cheese mixture, stirring gently. Add chopped tomatoes and fold in carefully (or serve them on the side if you have picky eaters). Sprinkle additional parmesan cheese on top, if desired.
pasta2W
**This post and photos are property of http://dishingwithdish.blogspot.com/ **

Monday, September 23, 2013

No-Bake Granola Bites

ball3W
I saw these on Mel's Kitchen Cafe last week and made them a few days later.  They looked so easy, and a lot of the reviewers really liked them.  My first attempt is the one I took pics of.  Everyone loved them, but I thought they were too sweet, so the next time I made them, I reduced the honey/agave.  They were just right, sweetness-wise, but as I suspected, were a little harder to form into balls that actually stuck together.  I had to squeeze them together in my hands firmly, and they worked that way.  Actually, a note on the original way:  I had a hard time forming these into balls right after mixing them up.  I stuck the mixture in the fridge for a little over an hour and tried again; much better!

So, first I'd make these with the original amount of honey/agave and see how that works for you; if you find it too sweet, try reducing to 1/2 cup (from 2/3 cup) the next time.  I also reduced the chocolate chips down to 1/2 cup.  Next time I make them, I might try adding an extra tablespoon of peanut butter to help them stick (I use unsweetened pb).  Just be sure to squeeze the mixture together more to form balls.  Having clean hands helps too; I had to wash mine when I was about half-way through forming them.  
ball1W
My boys LOVE these!!  The first batch I made was gone in 24 hours.  They take two bites to school with them for a snack; I send it in a tiny glad-ware type thing, with a fork, because these get a little sticky un-refrigerated.  They fill them up much more than your typical store-bought granola bar.  They also want to eat them at home.  They keep very well in a covered container in the freezer; just take out and eat as needed.

This is one of the only recipes in the world I use quick oats for.  I had to actually buy them specially, for this recipe.  Mel states that old-fashioned oats won't work because the mixture won't hold together.  If you only have whole oats and don't want to buy quick, you can blend whole oats in the food processor until they are broken down a little bit.  
ball3W
Last time I made these, I used mini M&M's in place of mini choco chips and chocolate peanut butter.  My fave version!
No-Bake Granola Bites
adapted from Mel's Kitchen Cafe

2 cups quick oats
1 cup crispy rice cereal (like Rice Krispies)
1 cup ground flaxseed
1 cup creamy peanut butter (or chocolate pb or sunflower butter)
1/2 cup mini chocolate chips, mini M&M's, or choc-covered sunflower seeds
2/3 cup honey and/or agave nectar (can use 1/2 cup + 1 TBS*, but may be harder to form balls)
2 teaspoons pure vanilla extract
2 tablespoons coconut oil

1.  Combine the oats, flaxseed, and Rick Krispies together in a large bowl, carefully.  In another smaller bowl, combine the peanut butter, chocolate chips, honey and/or agave (I used a mix of both), vanilla, and coconut oil.  Mix the peanut butter mixture into the dry mixture carefully, mixing gently so the crispy rice cereal doesn't get crushed. Mix until well-combined.  At this point, I like to refrigerate the mixture for about an hour before forming balls, so it firms up a little.  

2.  Using a cookie scoop (or roll small amounts in your hands), drop rounded tablespoonful-sized portions onto a parchment or wax paper lined cooking sheeet. I used my cookie scoop and then rolled the scooped portion out between my palms.  Make sure you gently press them to stick together.

3.  Refrigerate for 1-2 hours. At this point you can serve them or combine the chilled granola bites in a large tupperware-type container or ziploc bags to freeze or refrigerate. They will stay fresh in the refrigerator for up to a week or for a few months in the freezer. 

*If using less honey or agave, try using 1/2 cup PLUS 1 Tablespoon.  I made them this way last time, and it really made a difference.  They stuck together much better and the sweetness level was just right.
**Make sure the oats you use are gluten free if making this gluten-free.
ball2W
**This post and photos are property of http://dishingwithdish.blogspot.com/ **

Friday, September 20, 2013

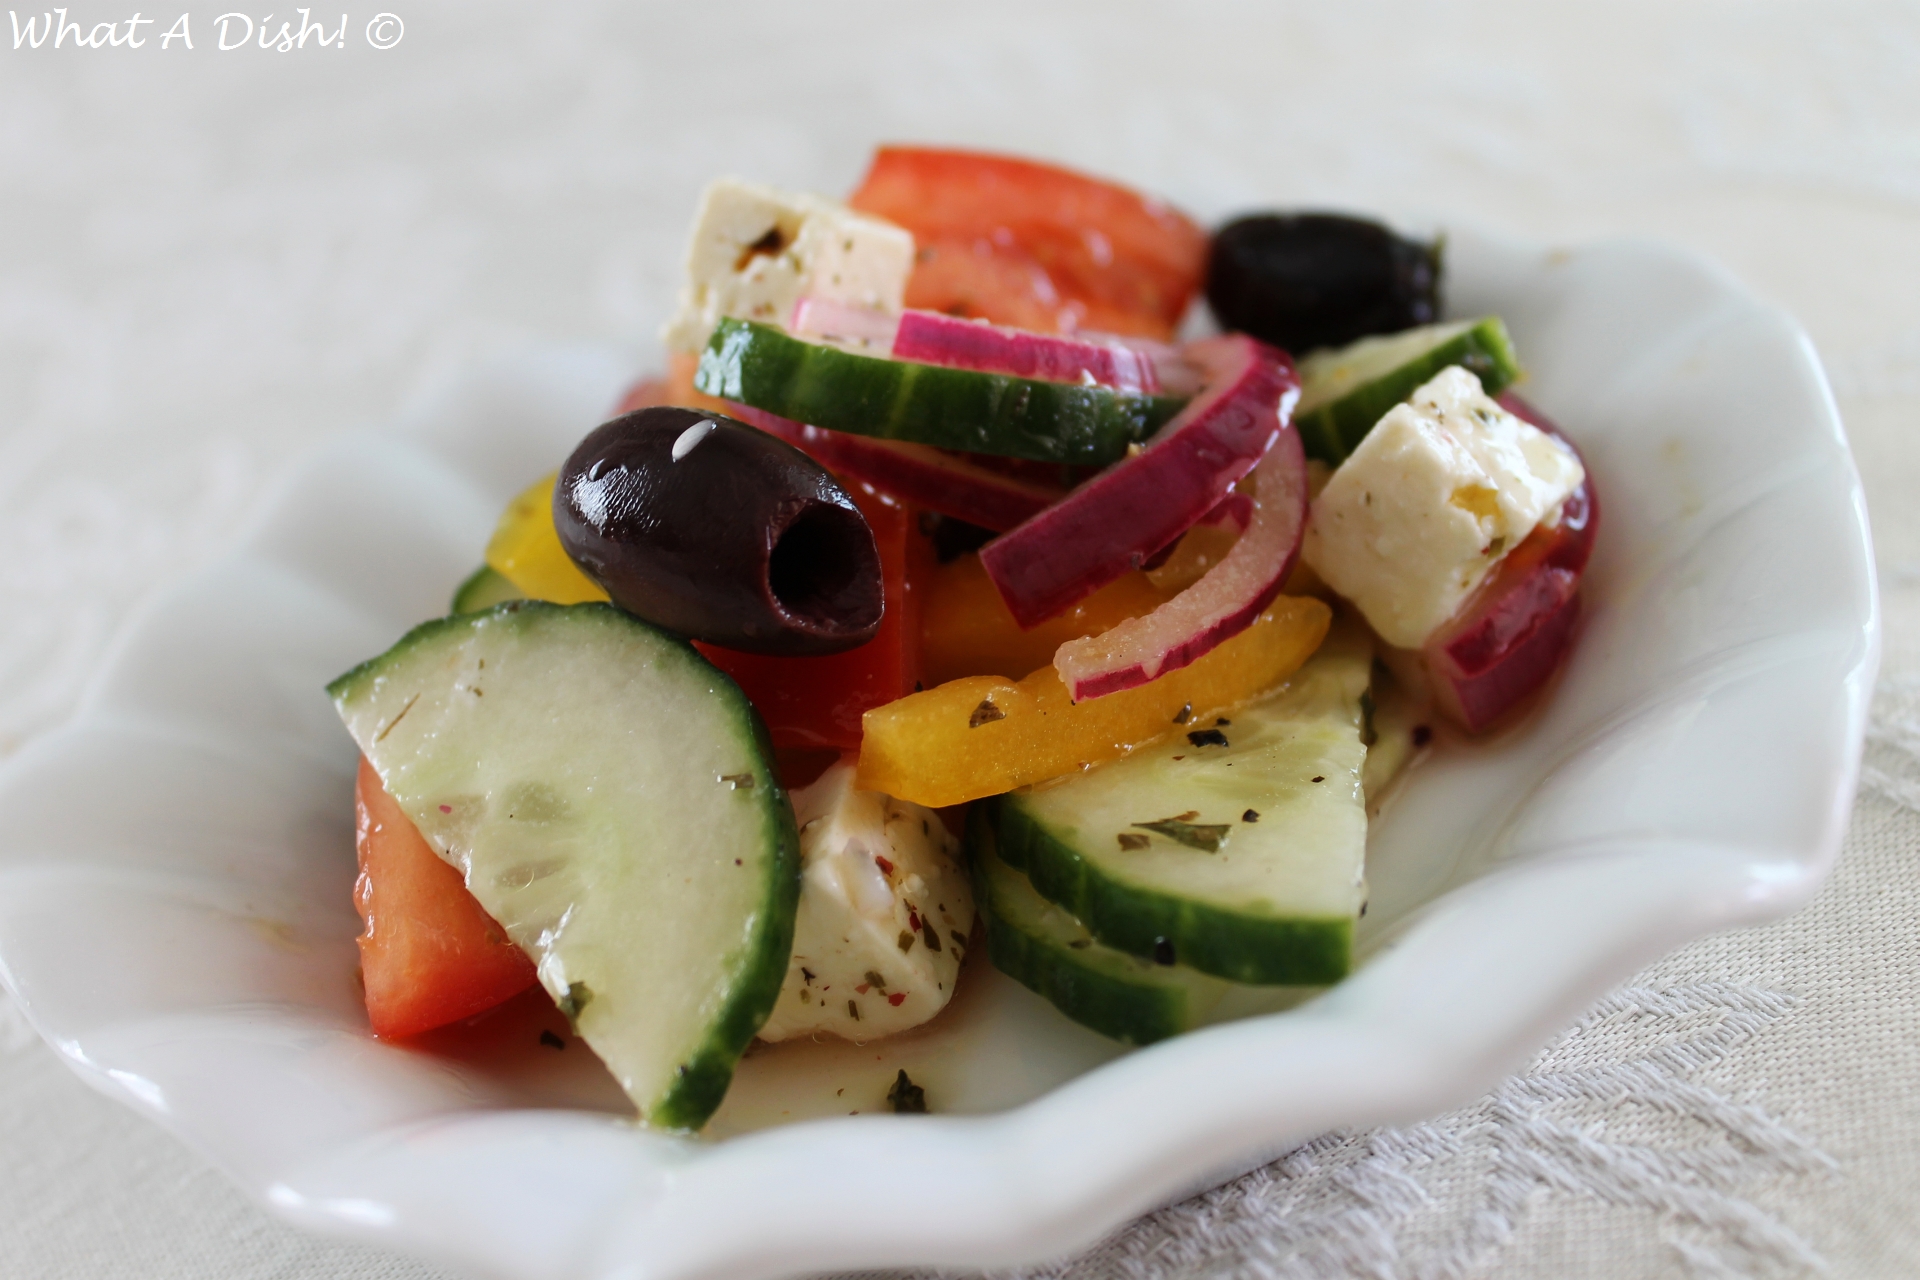
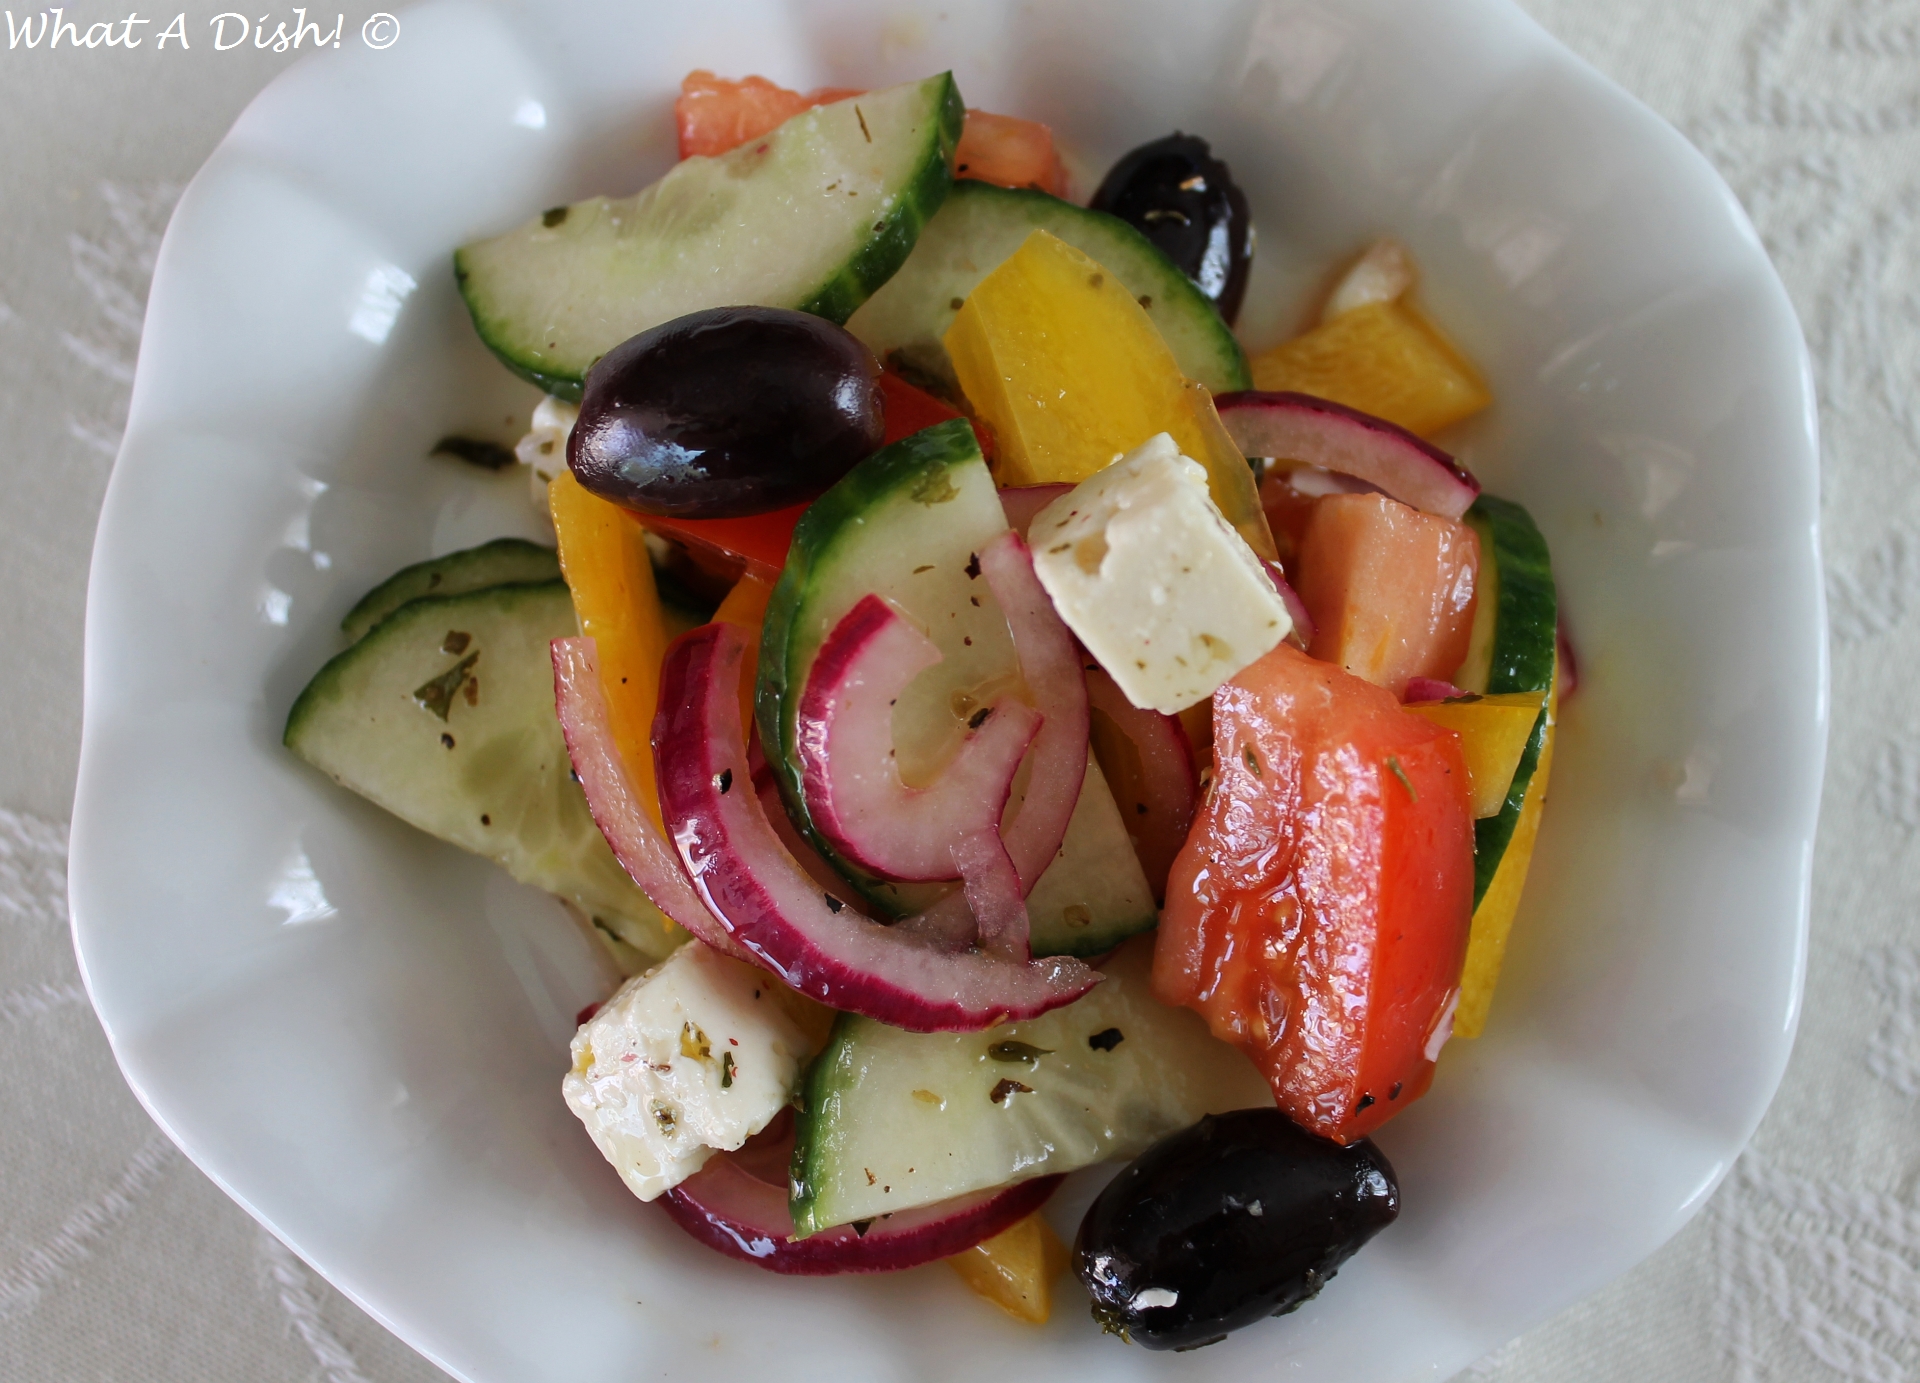
Greek Village Salad

greek3W
This is supposed to be a more "traditional" Greek salad, in that in contains no lettuce.  It's supposed to be closer to salads actually eaten in villages in Greece, although I wouldn't know anything about that, having never been there.  :)  (But maybe one day!!!)  It was very good, with all the Greek flavors in there.  I have to import my own Greek olives here now, but it's worth it.  For the feta, I used jarred feta marinated in oil and herbs- it is so good.  
greek1W
This salad is so much better than what passed for Greek salad at this Greek restaurant in the States we went to- I researched it before our trip and it got raving reviews, so we went, and everything was just ok.  The salad was sad, though.  It came in a tiny styrofoam container, and was just lettuce with a few sad olives, a few sprinkles of feta, and then, pickled beets and garbanzo beans.  ????!!  I tried to eat it but just couldn't.  Service was slow and the servers were rude, too.  Anyway.  I'd rather make my own Greek food.  

Greek Village Salad
adapted from Food

Salad:
2-3 tomatoes, cut in wedges
1 slender green cucumber
1 yellow or red pepper
1 medium or small red onion, sliced
1/2 cup Kalamata olives
4-8 ounces feta cheese, sliced (or in chunks)

Dressing:
3 tablespoons olive oil
1 tablespoon red wine vinegar
2 tablespoons fresh lemon juice
1/2 teaspoon dried oregano
1 teaspoon parsley, chopped
3 garlic cloves, crushed
1/2 teaspoon salt
fresh ground black pepper

1.  Cut tomatoes into wedges.  Slice cucumber in 1/2 lenghtwise then in cut in thin slices.  Wash, core and seed peppers. Cut in half then cut into thick strips.  Separate onion slices into rings.  Place prepared ingredients in a bowl; top with the olives.

2.  To make dressing, whisk together all dressing ingredients in a small bowl.  Pour the dressing on just before serving. Top with feta cheese (to taste) and sprinkle with oregano.

**This post and photos are property of http://dishingwithdish.blogspot.com/ **

Wednesday, September 18, 2013

Thai Chicken Satay


satayW
I enjoyed this Chicken Satay.  It was very flavorful.  I'd make it again, but I'd find a different peanut dipping sauce- this one called for too much fish sauce and it was too salty.  I enjoyed a little bit of it mixed with rice and cilantro, though.  I'm excited to be trying more Thai recipes!
satay1W
Thai Chicken Satay
adapted from Closet Cooking

2 teaspoons coriander seeds (toasted and ground)
2 teaspoons cumin seeds (toasted and ground)
1/4 teaspoon turmeric (ground)
2 stalks lemongrass (peeled & chopped)
1 shallot (diced)
1 tablespoon garlic (grated/pressed)
1 tablespoon galangal (or ginger, grated)
1 birds eye chili (sliced)
1 lime (juice and zest)
2 tablespoons fish sauce
2 tablespoons brown sugar
1 tablespoon oil
1 pound boneless chicken (cut into thin strips)
* wooden skewers (soaked in cold water for 30 minutes)
Thai peanut dipping sauce

1. Mix the coriander, cumin, turmeric, lemongrass, shallot, garlic, galangal, chili, lime, fish sauce sugar and oil.  Marinate the chicken in the marinade in the fridge for 1 hour to over night.

2.  Skewer the chicken and grill it until cooked and slightly charred, about 3-5 minutes per side.  Serve with peanut dipping sauce.

**This post and photos are property of http://dishingwithdish.blogspot.com/ **

Monday, September 16, 2013

Vanilla Bean Ice Cream

ic4W
Vanilla Bean ice cream is a basic, yet fancy-ish ice cream and everyone should have a recipe for it.  I've shared one or two recipes for this in the past, but I much prefer this one for how simple it is, plus the rich and creamy flavor.  This is another perfect recipe from David Lebovitz.  
ic2W
Vanilla Bean Ice Cream
adapted from David Lebovitz

1 cup whole milk
¾ cup granulated sugar
2 cups heavy cream, divided
Pinch of salt
1 vanilla bean, split in half lengthwise
6 egg yolks
¾ teaspoon vanilla extract
1. Warm the milk, sugar, 1 cup of the heavy cream and the salt in a medium saucepan over low heat, stirring until the sugar is dissolved.  Scrape the seeds from the vanilla bean into the milk mixture and add the bean to the mixture as well.  Cover, remove from the heat and let steep at room temperature for 30 minutes.
2. Pour the remaining 1 cup heavy cream into a large bowl and place a fine-mesh sieve on top. Whisk the egg yolks in a medium bowl (I use my KitchenAid).  Slowly pour the warmed milk mixture into the egg yolks, whisking constantly.  Scrape the mixture back into the saucepan.
3. Place the saucepan over medium heat and stir constantly with a rubber spatula, being sure to scrape the bottom of the pan as you stir, until the mixture thickens and coats the back of the spatula, a few minutes.  The mixture should register 170 to 175 degrees F on an instant-read digital thermometer.
4. Pour the custard through the fine-mesh sieve and stir it into the cream.  Place the vanilla bean into the custard, stir in the vanilla extract, and place the bowl over an ice bath.  (I skip the ice bath.) Stir occasionally, until the mixture is cool. Cover and transfer the custard to the refrigerator until completely chilled, at least 8 hours or overnight.
5. When ready to churn the ice cream, remove the vanilla bean from the custard and freeze the mixture in your ice cream maker according to the manufacturer's instructions. Transfer to a freezer-safe container and store in the freezer.
icW
**This post and photos are property of http://dishingwithdish.blogspot.com/ **

Friday, September 13, 2013

Thai Cashew Salad

A few nights ago, I wanted a healthy veggie side to go with lumpia for dinner.  I picked this salad.  I'm not sure if it's authentic or just Thai-inspired, but either way, it was healthy and delicious.  The salad is supposed to be served on a bed of fresh cilantro and basil, but as is normal here, I couldn't find what I wanted- fresh basil- even after spending time at two different groceries on opposite sides of the island, and compromising my baby's nap.  :(  Sad times.  I know, I should just grow it, but I always kill it instead.  Anyway.... it was good with just cilantro but it would have been even better with the basil!
Thai Cashew Salad
adapted from About

1 English cucumber (or 2 small cucumbers) 
1 carrot, grated
1 cup whole roasted unsalted cashews
1/2 large red bell pepper, OR 1 small red pepper, sliced thinly
2 green onions, sliced (or cut in strips lengthwise)
generous handfuls of fresh cilantro and fresh basil to make a "bed" for the salad

Salad Dressing:
1 Tbsp. fresh lime juice
1 Tbsp. soy sauce*
1 Tbsp. fish sauce
1 tsp. rice vinegar or white wine vinegar
2-3 cloves fresh garlic, pressed or minced
1 fresh red chili, de-seeded and minced, OR 1-2 tsp. hot chili sauce
1-2 tsp. white sugar (to taste)
pinch of white pepper (or substitute regular black pepper)

1.  First, prepare the dressing by mixing all salad dressing ingredients together in the bowl.  Taste-test for sourness/spiciness, adding more sugar if it's too sour for your taste, or more chili if it's not spicy enough. Set aside.

2.  Slice the cucumber, then cut the slices in half. Place in a salad bowl.  Add the grated carrot, cashews, red pepper, and spring onions.  Pour the dressing over and toss well.

3.  Place salad on a mixed bed of fresh cilantro and fresh basil, and serve immediately. Enjoy!!
*Use gluten-free soy sauce to make this gluten-free.

**This post and photos are property of http://dishingwithdish.blogspot.com/ **

Thursday, September 12, 2013

Cat Cake

cat1W
We had another birthday in the beginning of September.  The birthday boy wanted a cat cake this year.  So we had a puppy cake and cat cake close together.  This one actually comes out of my mom's old Better Crocker cookbook.  When we were at her house this summer, I was looking through it and my son saw this cake and wanted it.  I think I had the same cake when I was little!  Fun times.  
catW
To make this, you'll need two round cakes, 8 or 9 inch.  Then you leave one whole and cut the other into shapes to make a cake.  There is a pattern on the Betty Crocker website.  Go there and scroll down.  :)  For a cake like this, where you'll be cutting it up, a firm cake is a must.  I always do a pound cake for things like this.  This time, I just used an easy recipe from MY Betty Crocker cookbook, which is "newer" because I got it in 2000, ha ha.  

Betty Crocker's Pound Cake
adapted from Betty Crocker

3 cups all-purpose flour
1 teaspoon baking powder
1/4 teaspoon salt
2 1/2 cups sugar
1 cup butter, softened
1 teaspoon vanilla or almond extract
5 large eggs
1 cup milk or evaporated milk

1.  Heat oven to 350°F. Grease bottom and sides of 8 or 9-inch pans with shortening; lightly flour. (For ease in removing cakes after baking, line each pan with wax paper (cut into a circle to fit pan).  Grease and flour paper.)

2.  In medium bowl, mix flour, baking powder and salt; set aside. In large bowl, beat granulated sugar, butter, vanilla and eggs with electric mixer on low speed 30 seconds, scraping bowl constantly. Beat on high speed 5 minutes, scraping bowl occasionally. Beat flour mixture into sugar mixture alternately with milk on low speed, beating just until smooth after each addition. Pour into pans.

3.  Bake 30-45, or until toothpick inserted in center comes out clean. Cool 20 minutes; remove from pan(s) to wire rack. Cool completely, about 2 hours.

**This post and photos are property of http://dishingwithdish.blogspot.com/ **

Monday, September 9, 2013

Tortellini Sausage Soup

soup3W
This is a great soup for Fall.  It is very flavorful, hearty, and makes a ton!  I sent some of the leftovers to my husband's work for him to share with his co-workers, and I also enjoyed a bowl for lunch the next day.  Although I used reduced-sodium chicken broth (like always), this was still a little on the salty side... I think because of the canned tomatoes and sausage.  In the future, I'd just use one can of no-salt-added tomatoes.  It called for two zucchini but I had a huge pile after shredding one, so I just saved the other one for later.
soup1W
Tortellini Sausage Soup
adapted from Our Best Bites

12-16 oz. bulk Italian sausage (if using links, remove from casings first)
4 cloves pressed garlic
1 onion, diced
½ cup water
2 15-oz. cans reduced-sodium chicken broth
½ cup apple cider
1 16-oz. can diced tomatoes
1 8 oz. can tomato sauce
1 cup sliced carrots
1 tsp. dried basil
1 tsp. dried oregano
1-2 medium zucchini, grated (great way to use your food processor if you have one)
2 tablespoons dried parsley
8-12 oz. package frozen cheese tortellini
2 Tbsp. dried parsley
Parmesan, for garnish, optional

1.  If you’re using link sausage, remove the casings and crumble into a large soup pot. To remove the casings, you can use a sharp knife to cut a slit down one side of the sausage and then peel back the casing.  If using bulk sausage, just brown and crumble like ground beef.  
2.  Chop onion and add to soup pot with garlic and a drizzle of olive oil. Continue cooking until onions are translucent and your sausage is cooked. 
3.  Add tomatoes, tomato sauce, cider, water, chicken broth, carrots, oregano, and basil. Cover and simmer for 1/2 hour. Add parsley and zucchini and simmer for another 15 minutes or so. Add the tortellini and cook until tender, and then serve with freshly-grated Parmesan.
soupW
**This post and photos are property of http://dishingwithdish.blogspot.com/ **

Friday, September 6, 2013

Greek-Style Garlic-Lemon Potatoes

pot3W
I wanted a side dish to go with our Greek Yogurt Chicken the other night, and I spotted this recipe in my Cook's Illustrated International Recipe cookbook.  This recipe was perfect, in that it had Greek flavors, and was also made on the stove top, since the oven was busy roasting the chicken.  This dish complimented the chicken nicely and was very flavorful.  For even more Greek flavors, you can top these with Greek olives and feta cheese after cooking.  

Note: I only had a 10-inch skillet, so I just used one less potato but the same amount of lemon/garlic.  It was still good.
potW
Greek-Style Garlic-Lemon Potatoes

1 Tbs. olive oil
1 Tbs. butter
4 medium Yukon Gold potatoes, peeled, cut lengthwise into 8 wedges (Halve the potato lengthwise, then cut each half lengthwise into quarters, then halve those lengthwise into equal-sized wedges.  Each wedge should be about 3/4-inch wide.)
4-5 medium garlic cloves, minced or pressed through garlic press (about 1.5 Tbs)
1-3 tsp. extra-virgin olive oil
1 Tbs. fresh grated lemon zest 
2 Tbs. fresh lemon juice 
2 Tbs. minced fresh oregano leaves (1/2 tsp. dried)
1/2 tsp. fine salt
1/2 tsp. ground black pepper
2 Tbs. minced fresh parsley

1.  Heat oil and butter in a heavy-bottomed, very large skillet (ideally 12-inches across the bottom) over medium-high heat until butter melts and foaming subsides, swirling pan occasionally.  Add potatoes to skillet, cut sides down (ideally in a single-layer)

2.  Cook until golden brown (pan should sizzle but not smoke), about 6 minutes. Using tongs, turn potatoes so second cut sides are down; cook until deep golden brown on second side, about 5 minutes longer. Reduce heat to medium-low, cover tightly, and cook until potatoes are tender when pierced with tip of paring knife, about 5 minutes. While potatoes cook, combine next 7 ingredients in a small bowl.  
3.  When potatoes are tender, add garlic-lemon mixture; stir carefully (so as not to break potato wedges) to distribute. Cook, uncovered, until seasoning mixture is heated through and fragrant, 1 to 2 minutes. Sprinkle potatoes with fresh parsley.  
4.  Stir gently to distribute; serve immediately. Serves about 4 as a side dish.  (At this point you can add Greek olives & feta cheese, if desired.) 
**This post and photos are property of http://dishingwithdish.blogspot.com/ **

Wednesday, September 4, 2013

Puppy Dog Birthday Cake

cakeW
Over three weeks ago, in August, while we were in Germany, my baby turned two.  His current favorite thing is puppies, so I looked for puppy cake ideas.  I found a picture of one with no directions, but it looked easy enough, so we attempted it.  

You just bake two round cakes (8 or 9-inch).  Leave one intact and cut the other into sort of a yin-yang shape.  (Bring back memories of the 90's, anyone?!)  Then trim the pieces if necessary to make them look more puppy-dog-ish.  Frost the head in one color, adding sophisticated texture, if desired, as shown above.  With a different color, make a mound of frosting for the "snout".  The mouth is two red fruit snacks & the nose is part of an Oreo.  The rest of the mouth is Nutella, piped from a sandwich bag.  The eyes are PB M&M's.  The cake is a simple yellow cake from my mom's old Betty Crocker cookbook.
cake2W
Puppy be smokin'.


Starlight Yellow Cake
from Betty Crocker, via Cinnamon Spice

1/2 cup butter, softened
1 1/2 cups sugar
1 teaspoon vanilla extract
3 eggs
2 1/4 cups all-purpose flour
3 1/2 teaspoons baking powder
1 teaspoon salt
1 1/4 cups milk

1.  Preheat oven to 350 F. Grease bottom and sides of 2 round pans 9 X 1 1/2 inches, with butter and lightly flour.

2.  In a large mixing bowl beat butter and sugar until light and fluffy.  Add the vanilla and eggs and mix until combined.  In a separate bowl, mix flour, baking powder, and salt.  Add flour mixture to butter mixture alternatively with milk, mixing until just combined. 

3.  Pour into pans, dividing equally. Bake 9-inch rounds 25 to 30 minutes, or until toothpick inserted in center comes out clean.

4.  Cool in pan on wire rack 10 minutes; remove from pans to wire rack and cool completely before frosting.

                                                           **This post and photos are property of http://dishingwithdish.blogspot.com/ **

Monday, September 2, 2013

Greek Yogurt Roasted Chicken

chix1W
We love making whole roasted chicken around here- the whole fam loves it, even the pickiest one.  I'm starting to think that just one chicken isn't enough for my family anymore, but only one will fit in my tiny oven at a time, lol!  So we just have to make sure there are enough side dishes.  

This was one of the most delicious roasted chicken I've ever had.  The method is so simple- just slather plain Greek yogurt on the chicken and then roast- but the flavor was just amazing.  The skin was roasted to perfection too- crispy and just melt in your mouth.  Yes, I do eat the skin and I admit it!  My favorite part!!  I never touch the wings usually, but that was my favorite part of this chicken.  The chicken was very tender and released a lot of very flavorful juices during cooking- I should make gravy next time and serve it over mashed potatoes.  
chix4W
This recipe comes from the Penzey's Spice Catalog.  They have some delicious recipes in there- and I order many spices from them.  They have everything!!  For this recipe, I used their Greek seasoning for the first time.  If you don't have that, just use anything you want- they suggest rosemary, freshly ground black pepper, and salt.  

Greek Yogurt Roasted Chicken
adapted from Penzey's 

1 whole roasting chicken (5-8 lbs)
8 oz. plain Greek yogurt (use as much as necessary; I used slightly less)
2-3 tsp. chopped dried rosemary (optional)
1/2 tsp. salt, or to taste
1/2 tsp. freshly ground black pepper, or to taste
1-2 Greek seasoning (use in place of salt and pepper, if using)
1 small lemon
1 small onion, peeled, or 1/4 of a large onion

1.  Place the chicken in a roasting pan and coat thoroughly with yogurt.  Cover with plastic wrap and refrigerate for at least 8 hours or overnight.

2.  Preheat oven to 400 F.  Season the chicken with rosemary, salt and pepper (or Greek seasoning), and any optional seasonings.  Wash the lemon ad cut in half, lengthwise.  Place in the cavity of the chicken, and then place the onion in the cavity as well.  

3.  Roast at 400 for 60-75 minutes or until done.  Near the end, you may need to tent with foil if the skin is browning too quickly (but will brown quite a bit).  
chixW
 **This post and photos are property of http://dishingwithdish.blogspot.com/ **